Table of Contents
在 SAE 标准环境搭建 WordPress 博客
WordPress 是目前最流行的个人博客平台之一,使用 PHP 语言开发,轻便简单,功能完善。在新浪云上,利用 WordPress 可以很快搭建起属于自己的个人博客。
以下步骤全部在 Ubuntu 操作系统下进行,涉及到的工具有 Git、Firefox/Chrome、tar。这些工具也存在于 macOS 和 Windows 官方 Ubuntu 子系统的软件仓库中;Windows 下也有相应的替代工具。
创建 SAE 应用
在新浪云(sae.sina.com.cn)主页的应用管理下,选择创建新应用:
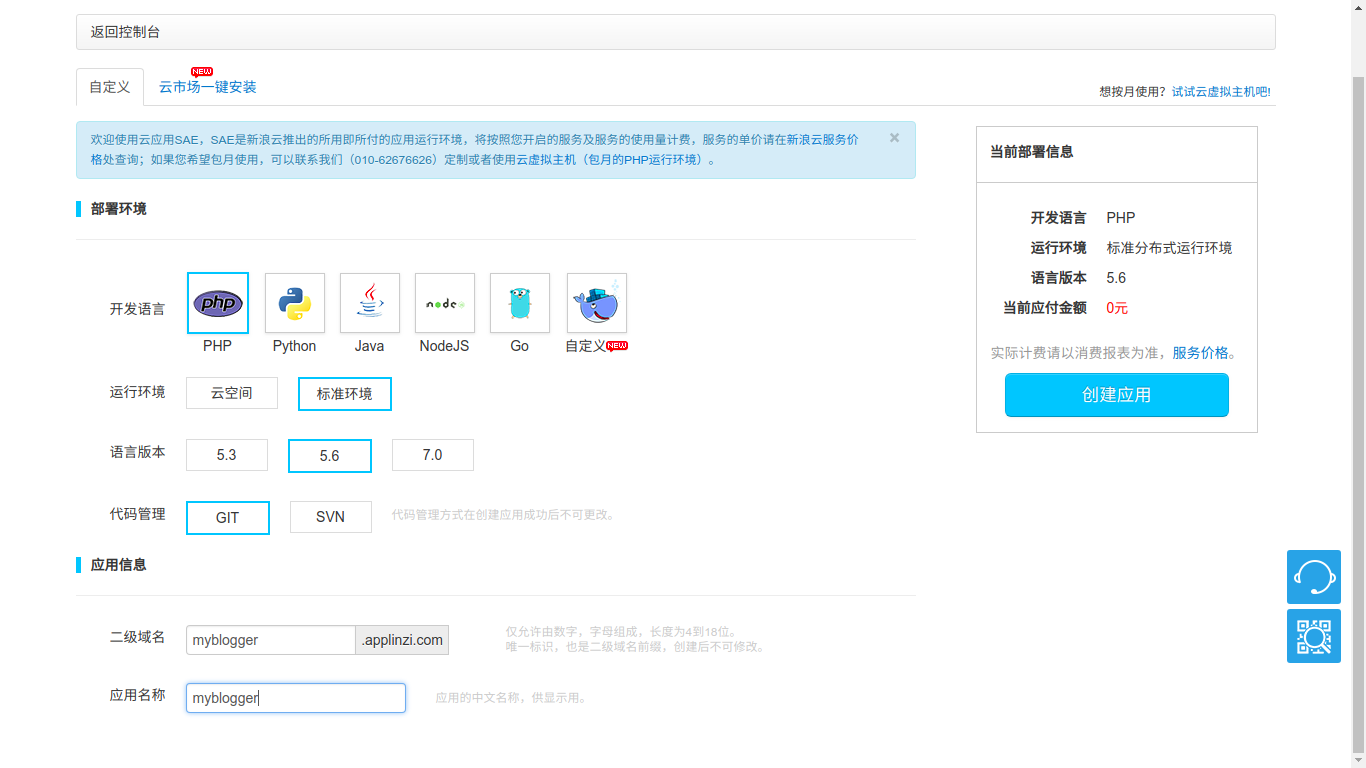
开发语言选择 PHP。
运行环境选择标准环境。
语言版本和代码管理,选择使用 5.6 版的 PHP,用 Git 管理代码。
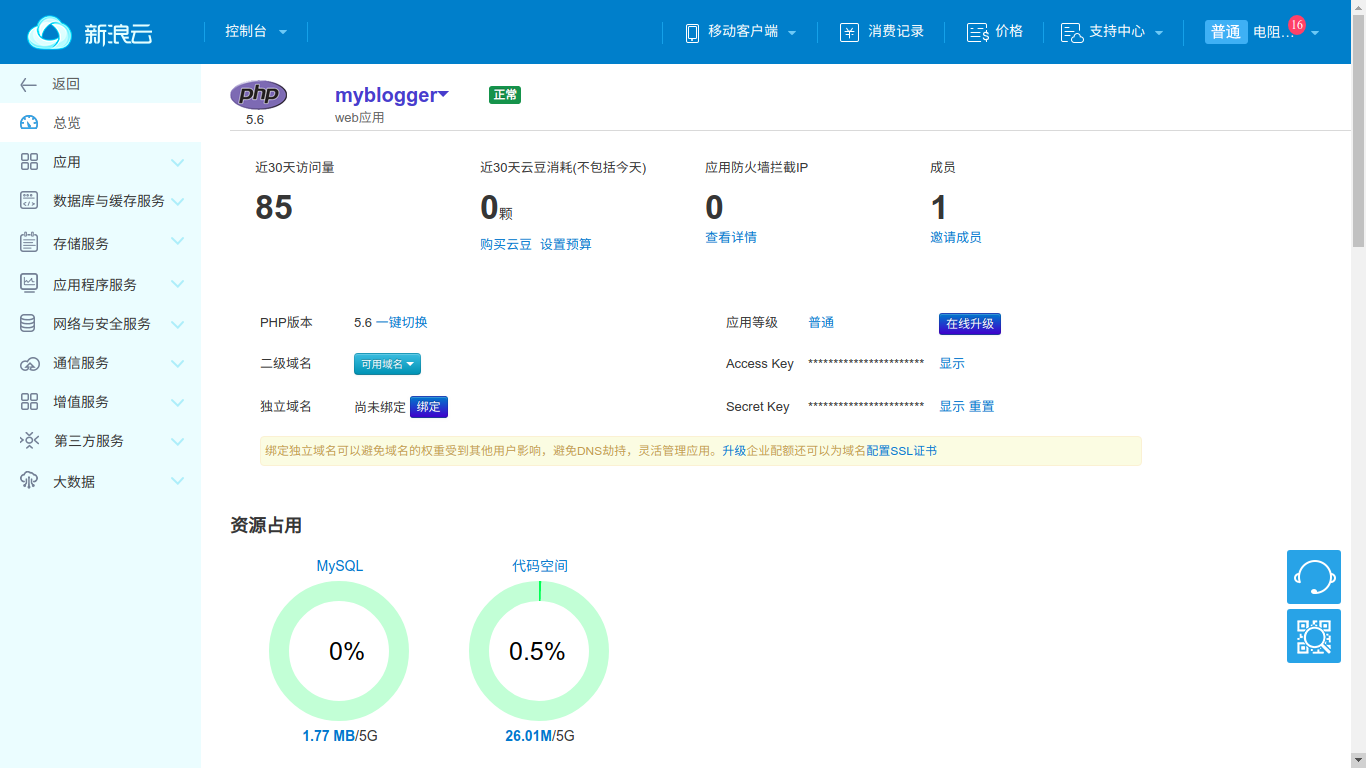
进入新创建的应用页面,点击侧面的总览,可以看到应用的具体信息:
云应用可以不需要独立域名,直接使用刚才注册的二级域名访问。比如现在就可以在浏览器输入新注册的应用域名:http://myblogger.applinzi.com:
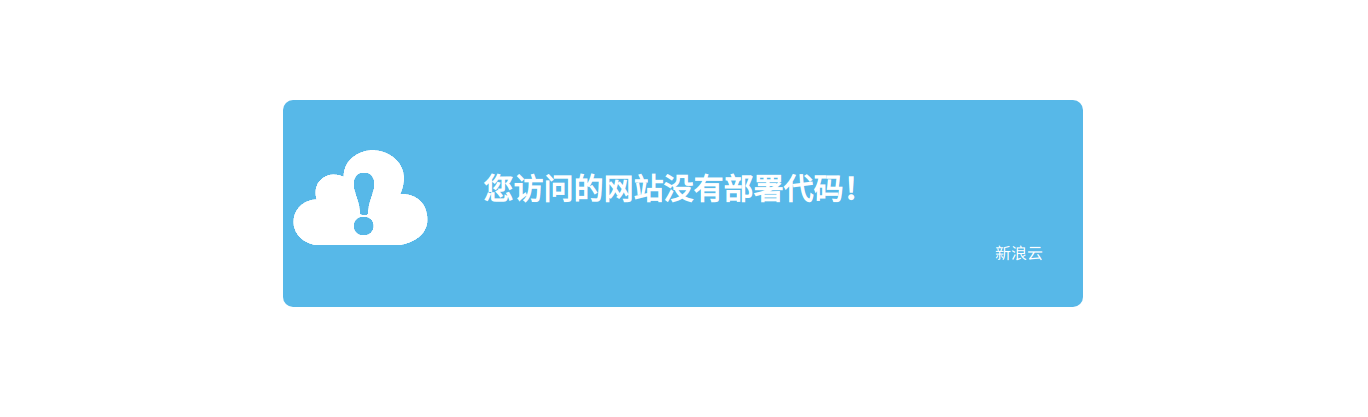
当然,现在的云应用还是空的。
部署代码
从官网下载 WordPress 的最新版,地址是:https://wordpress.org/latest.tar.gz。当时的版本是 4.9.8;实际操作时可下载官网提供的最新稳定版,并以本地文件名为准。
解压 WordPress 到工作目录:
$ tar xf wordpress-4.9.8.tar.gz建立本地 Git 仓库:
$ cd wordpress
$ git init
Initialized empty Git repository in /home/guanqiao/Workspace/wordpress/.git/
$ git add .
$ git commit -s -m "Init my wordpress"
关联本地代码到 SAE 的远程 Git 仓库:
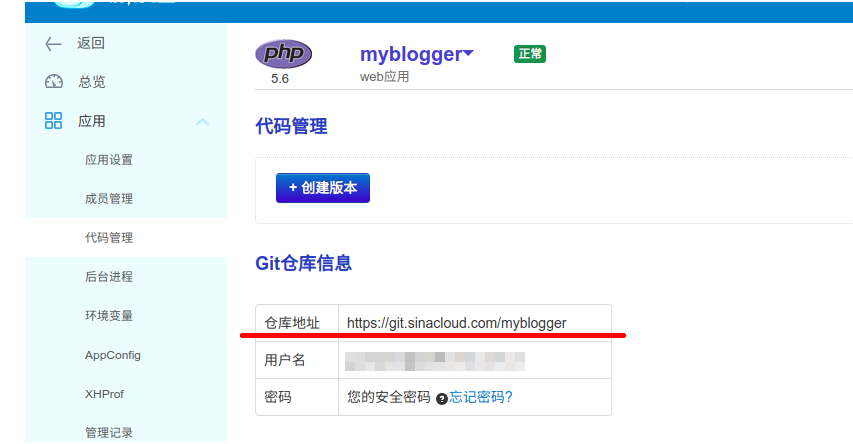
$ git remote add origin https://git.sinacloud.com/mybloggerSAE Git 仓库信息可以在应用的代码管理页面下看到:
最后提交本地代码到 SAE Git 服务器的版本 1 中:
$ git push origin master:1
Username for 'https://git.sinacloud.com':
Password for 'guanqiao':
Counting objects: 1636, done.
Delta compression using up to 4 threads.
Compressing objects: 100% (1611/1611), done.
Writing objects: 100% (1636/1636), 8.54 MiB | 550.00 KiB/s, done.
Total 1636 (delta 166), reused 0 (delta 0)
To https://git.sinacloud.com/myblogger
 * [new branch]      master -> 1
注意这里的密码不是登录密码,而是安全密码。
在浏览器访问自己的应用地址,应该可以看到 WordPress 已经上传成功。
更多关于代码部署的内容请参考 SAE 的代码部署手册。
建立数据库
WordPress 此时还不能正常访问,网页会提示后台没有数据库。
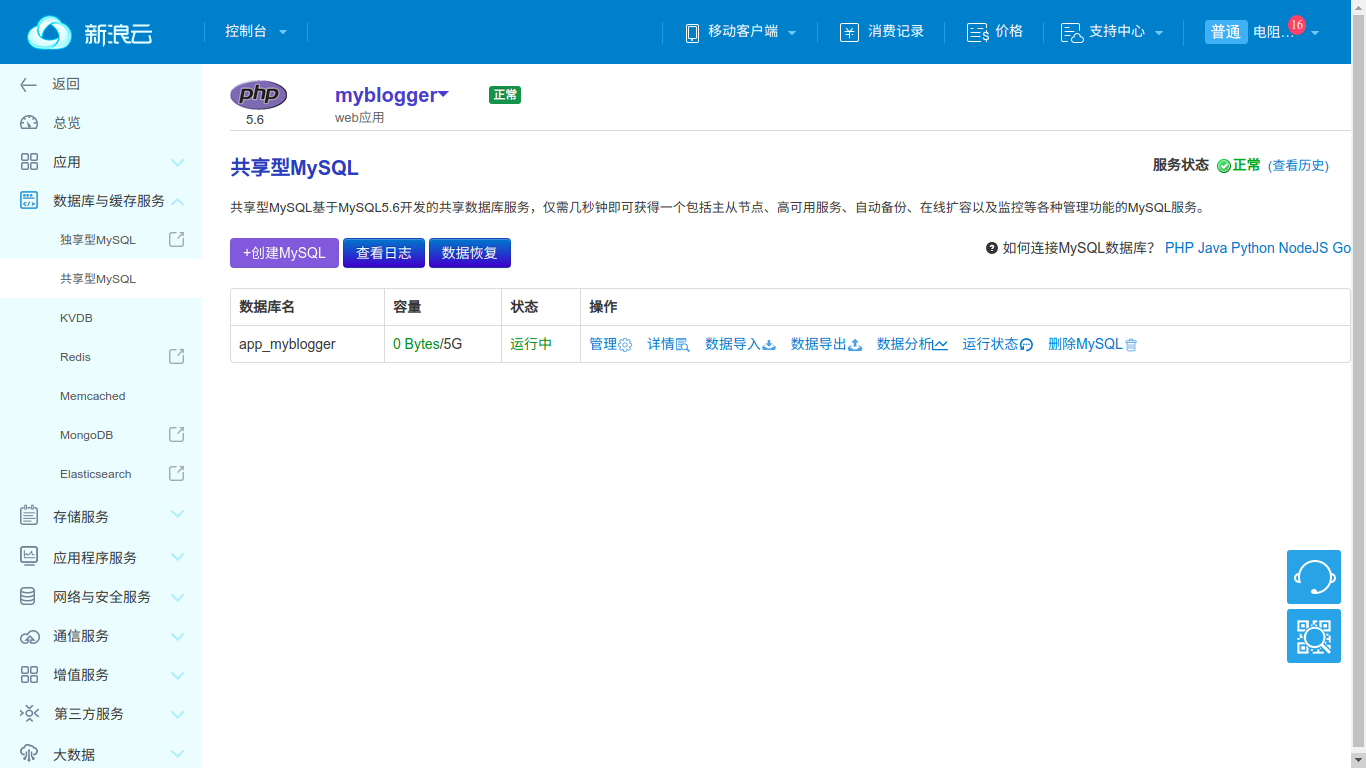
SAE 应用页面下点击数据库与缓存服务,选择共享型 MySQL。页面是空的,说明此时应用还没有数据库。
点击创建 MySQL:

因为是共享 MySQL 数据库,数据库的名字是自动生成的。
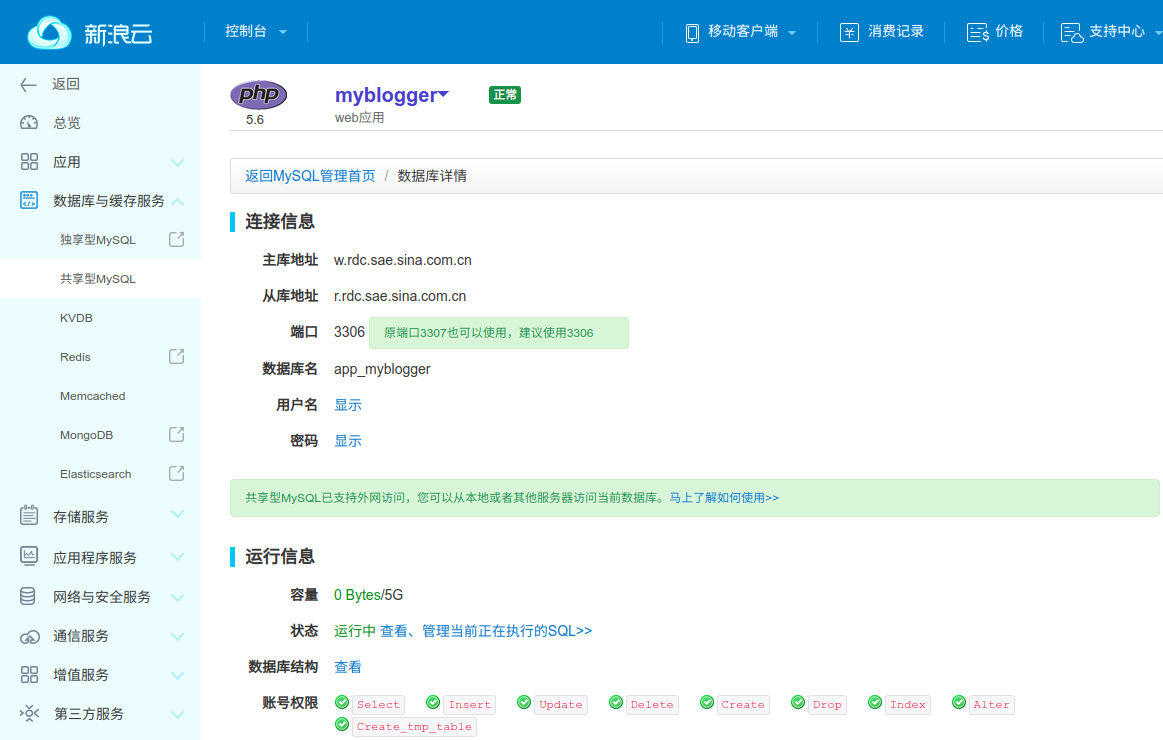
点击数据库操作里的详情链接,能看到数据库的具体信息。
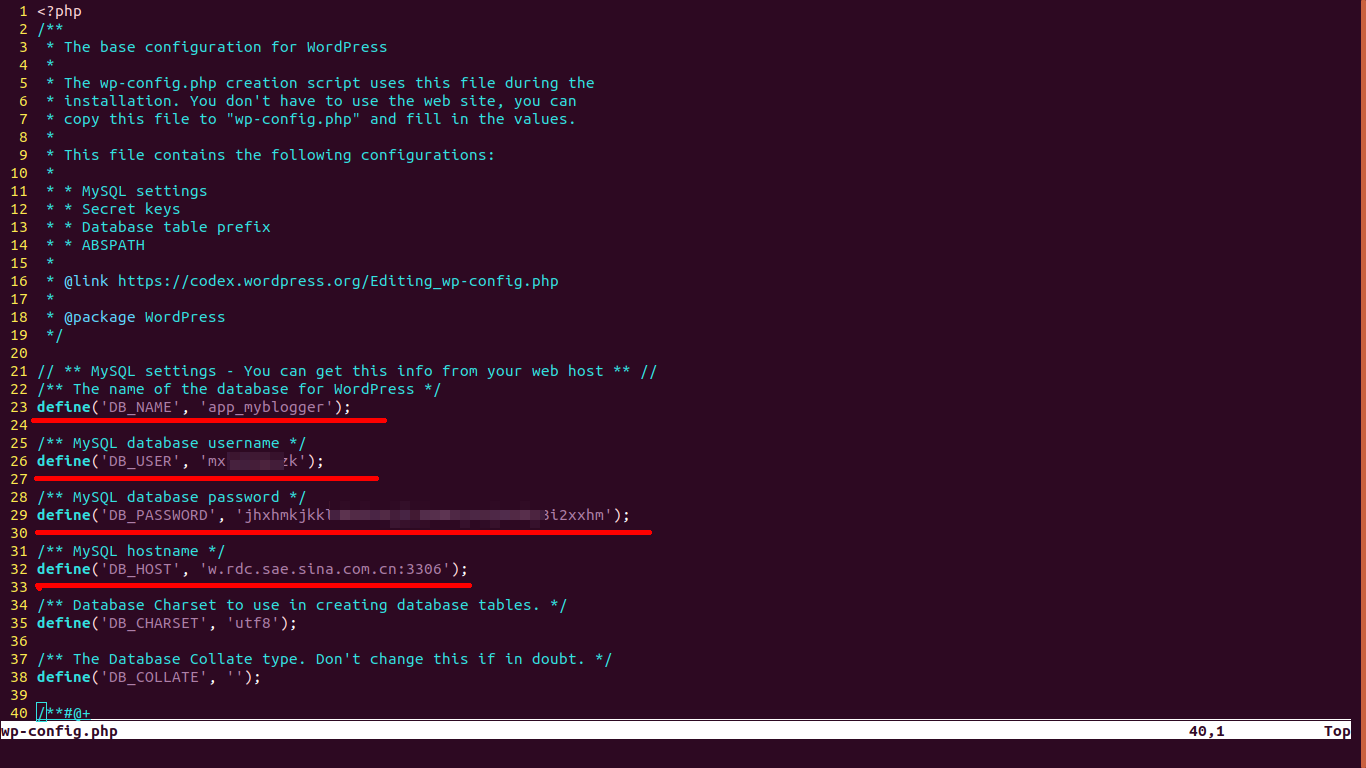
回到 WordPress 的工程目录下,根据官方的 wp-config-sample.php 创建 wp-config.php:
$ cp wp-config-sample.php wp-config.php修改 wp-config.php 的内容,把 SAE 刚才生成的数据库信息填写进去:
重新提交和部署代码:
$ git add wp-config.php
$ git commit -s -m "Add wp-config.php"
$ git push origin master:1
Username for 'https://git.sinacloud.com':
Password for 'guanqiao':
Counting objects: 3, done.
Delta compression using up to 4 threads.
Compressing objects: 100% (3/3), done.
Writing objects: 100% (3/3), 1.51 KiB | 1.51 MiB/s, done.
Total 3 (delta 1), reused 0 (delta 0)
To https://git.sinacloud.com/myblogger
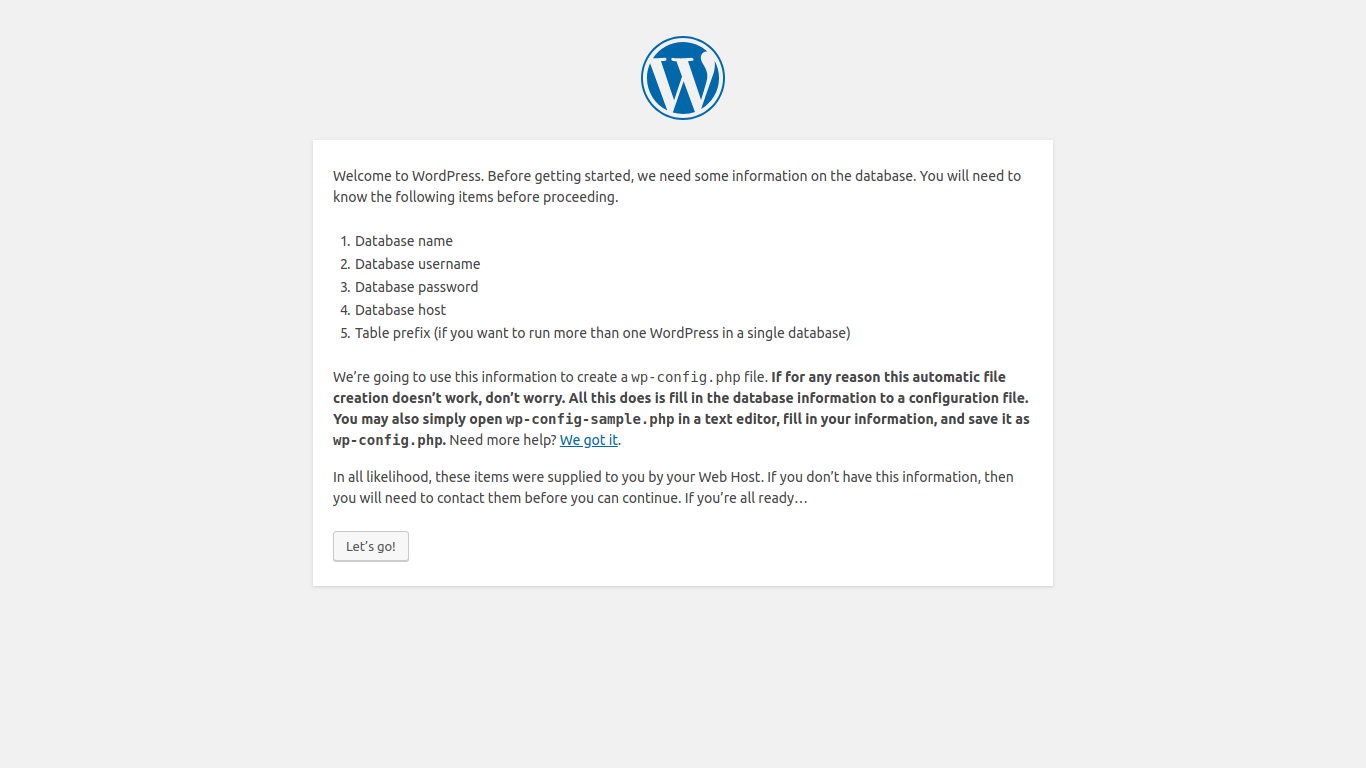
852f9e5..8122bfc master -> 1这时在浏览器访问自己的应用地址,出现的页面会变成 WordPress 的初始化页面。
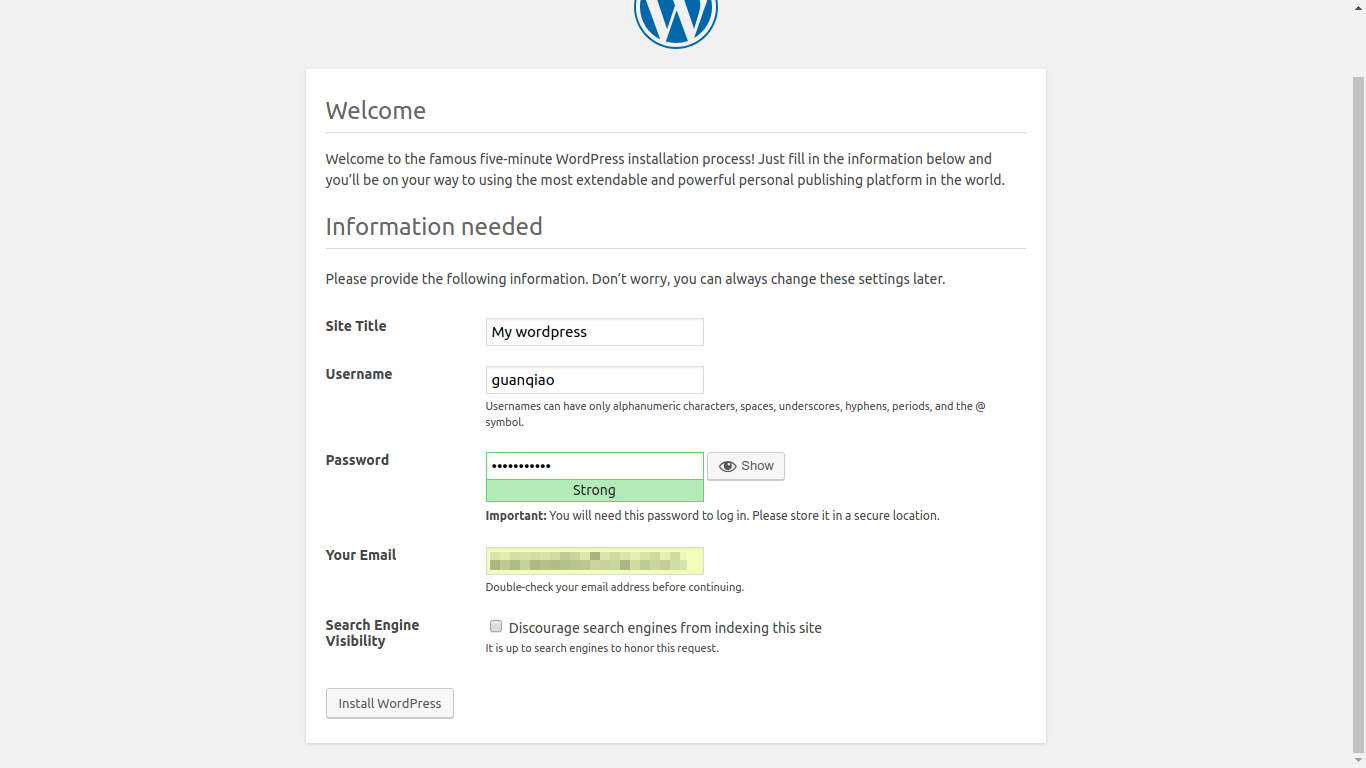
页面上填写的是博客标题和后台管理员的用户名、密码。如果使用的是官方默认配置,博客的后台地址一般是 https://{应用二级域名}/wp-admin。
比如这里是:http://myblogger.applinzi.com/wp-admin。
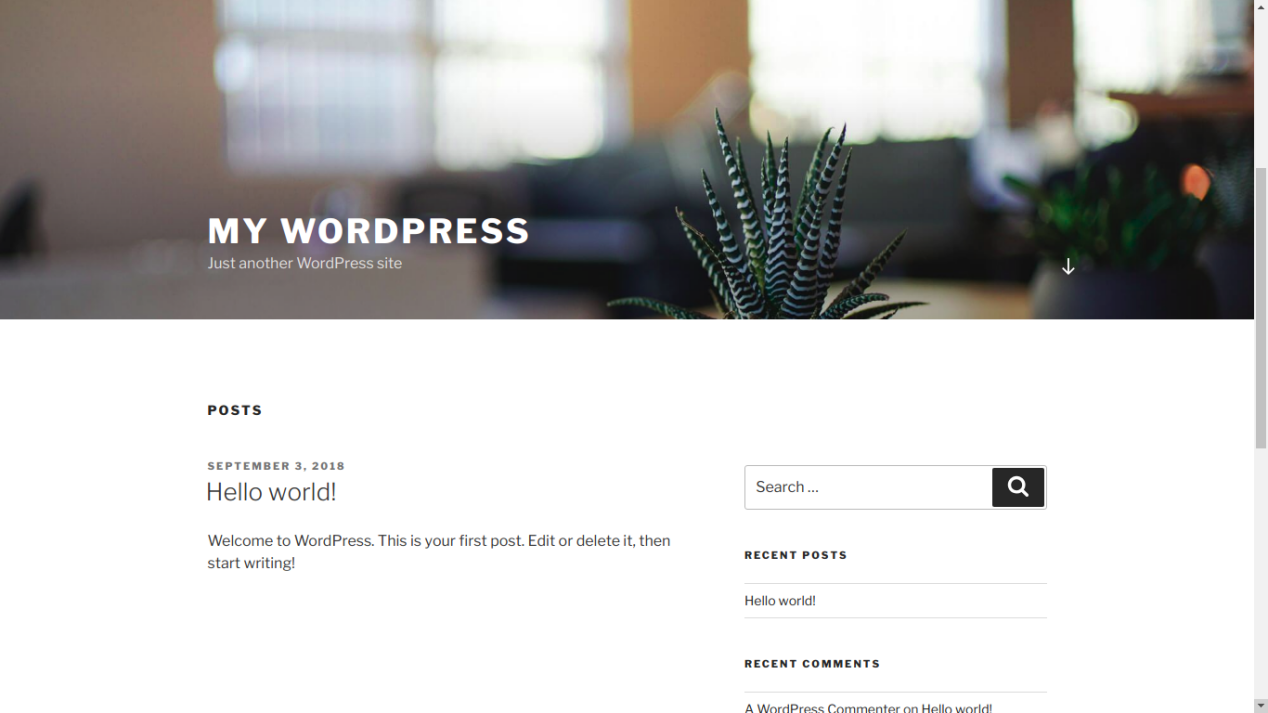
页面提交后,再次在浏览器输入自己的应用地址,显示的已经是个人博客的主页了。
使用 SAE Storage
新博客的后台可以编写并且发布博文,但是现在应该有个问题:上传图片总是提示上传失败。
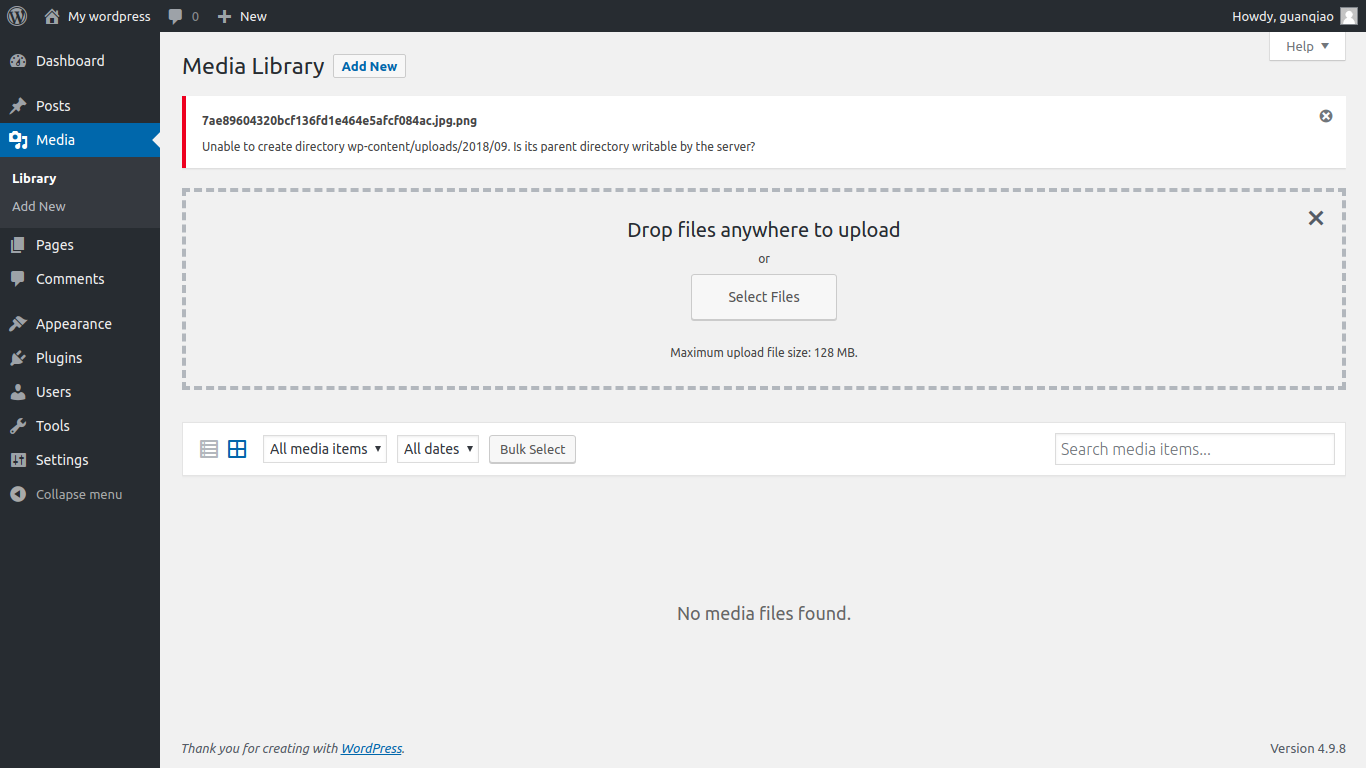
WordPress 上传图片的目录默认就在代码目录下。如果运行环境选择了标准环境,应用程序无法直接修改自己的代码目录。这是 SAE 标准环境分布式架构的特点。
为此 SAE 提供了 Storage。
SAE 的 Storage 是分布式文件存储服务,用来存放持久化存储的文件,支持文本、多媒体、二进制等任何类型的数据。WordPress 的各种资源完全可以放在 Storage 里。
进入应用页面,选择存储服务下的 Storage,点击新建 Bucket。Bucket 的名字由用户指定。
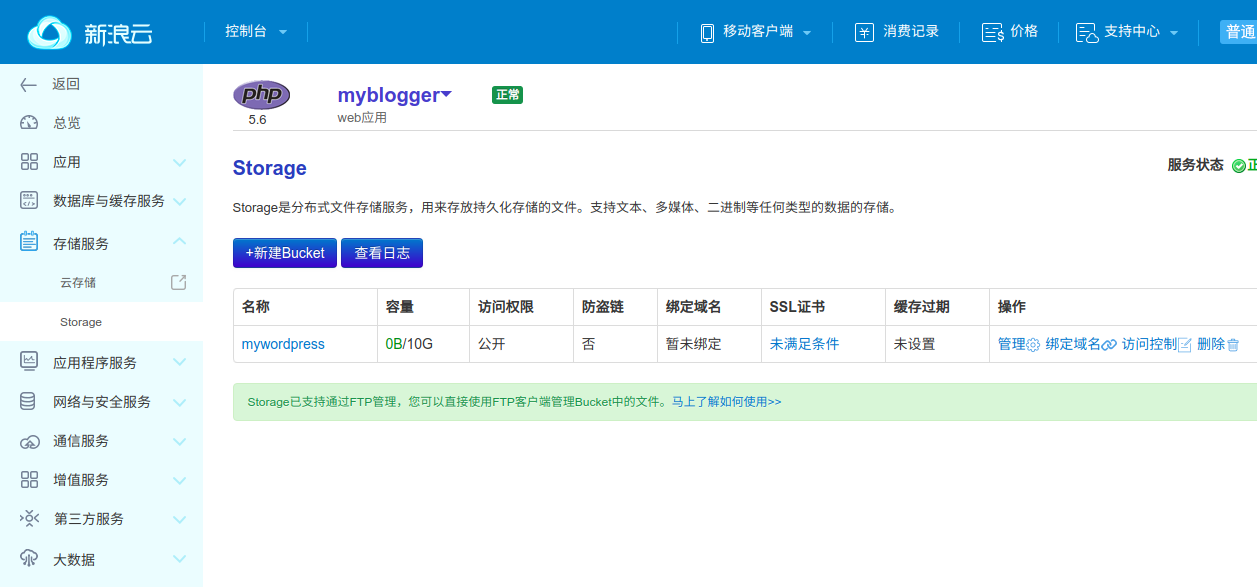
可以看到 Storage 的 Bucket 提供了 10G 的空间。
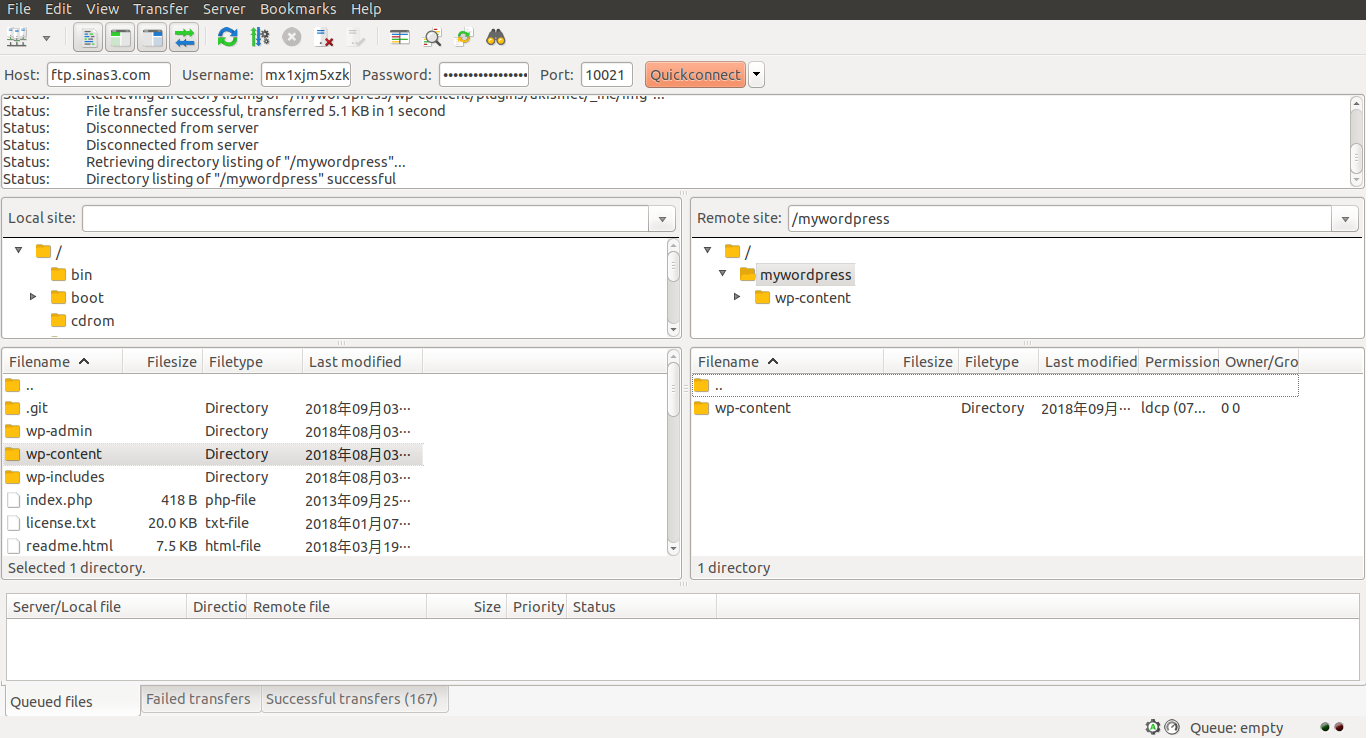
Storage 当时支持 FTP 登录,FTP 服务器的连接信息如下:
地址:ftp.sinas3.com
端口:10021
用户名:应用的 AccessKey
密码:应用的 SecretKey
其中的用户名和密码在应用的总览页面下。
使用 FTP 客户端 FileZilla 把 WordPress 工程目录下的 wp-content 上传到应用的 Storage。注意这里 Bucket 的目录名,不要把文件传到 Storage 的根目录下去了:
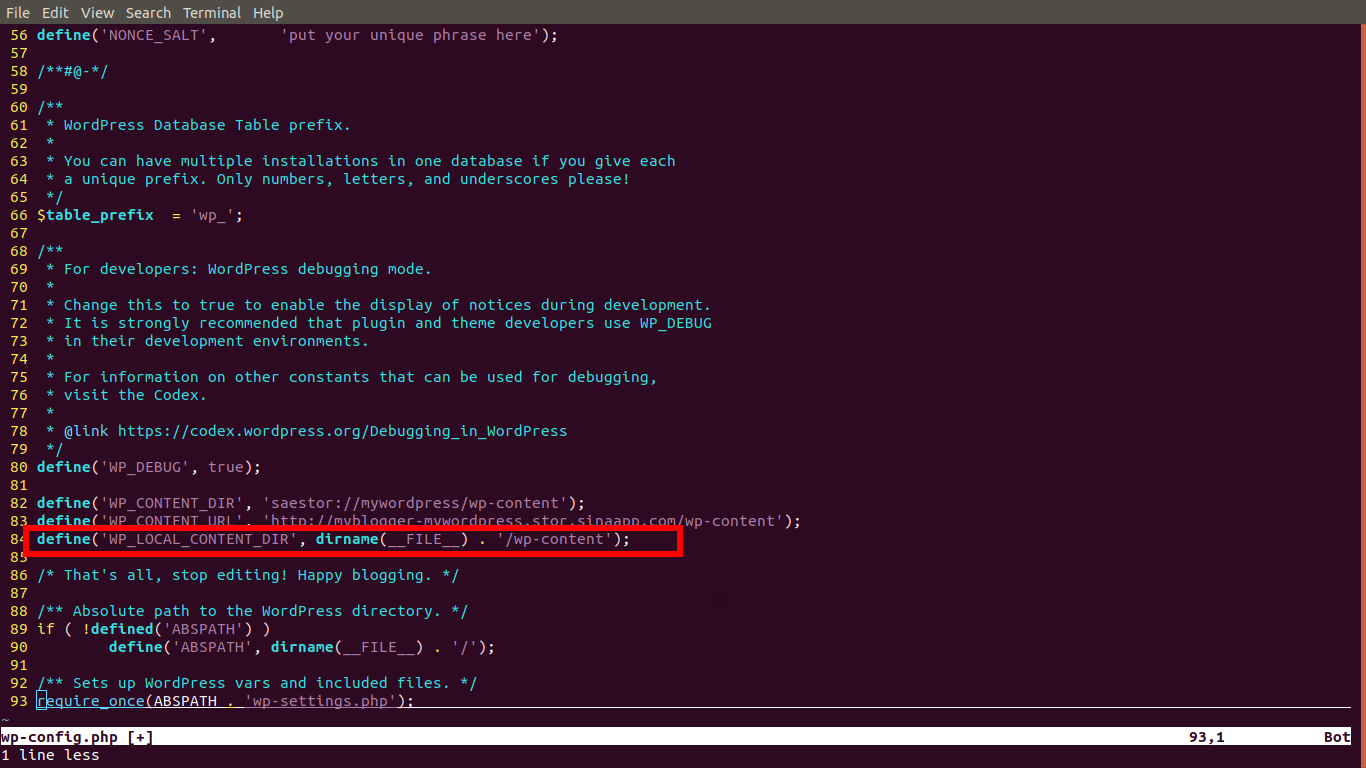
再修改 wp-config.php 文件,在 define('WP_DEBUG', false); 后面增加对 Storage 的定义:
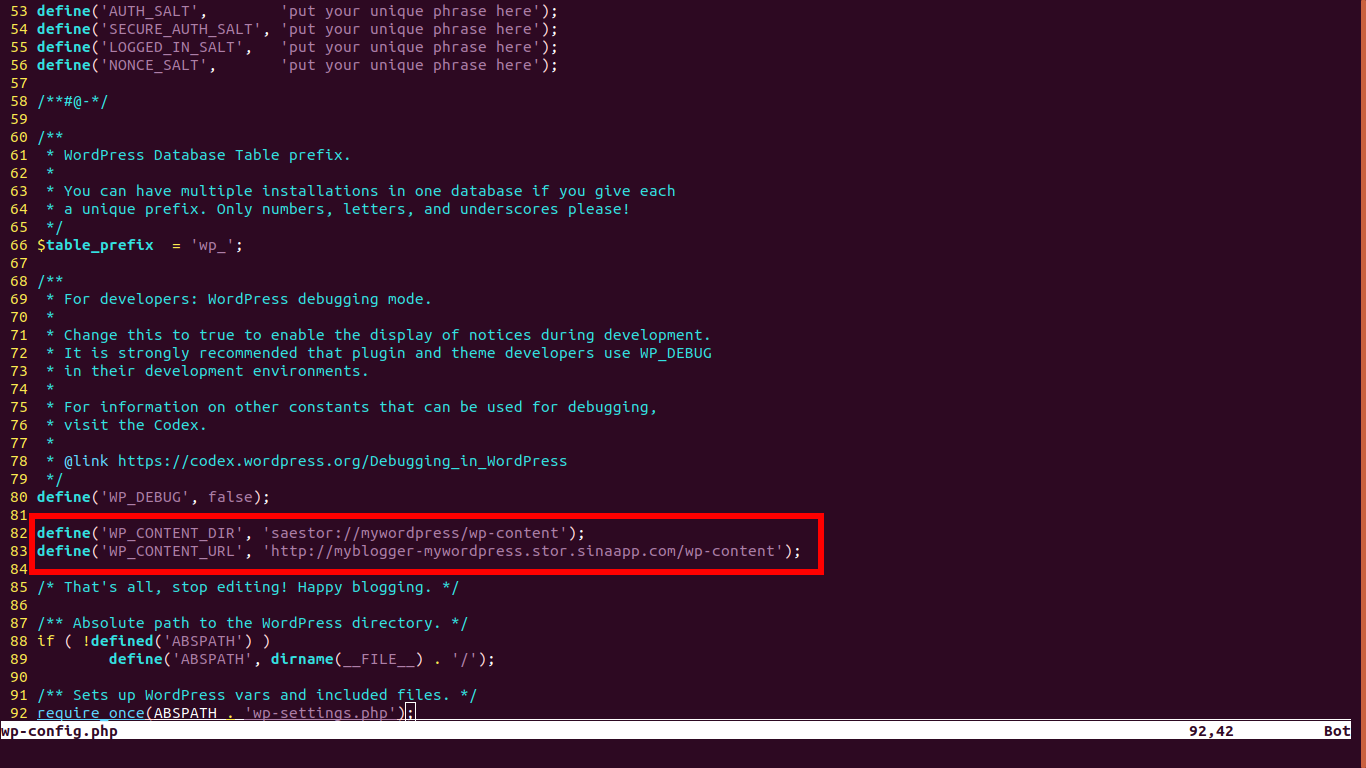
其中 WP_CONTENT_DIR 的格式是:
define('WP_CONTENT_DIR', 'saestor://{bucket名}/wp-content');WP_CONTENT_URL 的格式是:
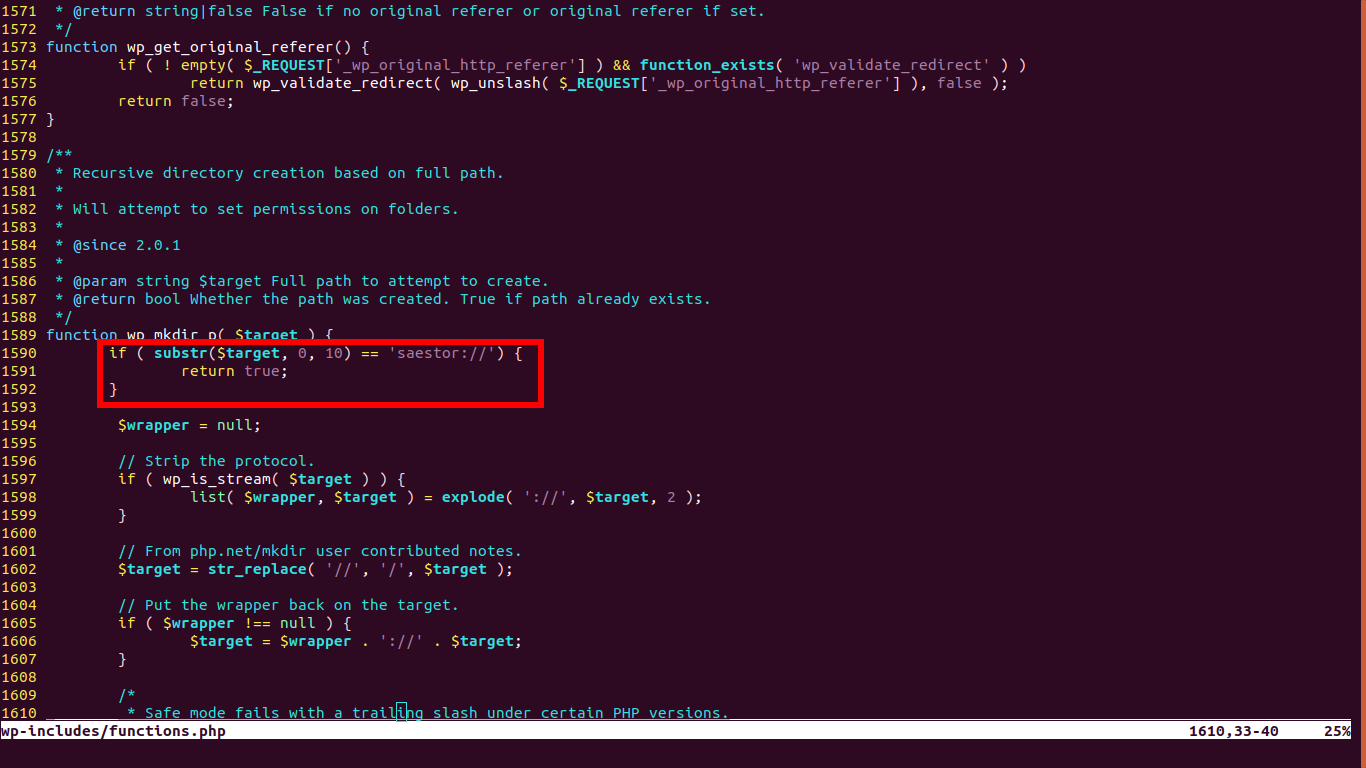
define('WP_CONTENT_URL', 'http://{应用名}-{bucket名}.stor.sinaapp.com/wp-content');接下来还要修改 wp-includes/functions.php 文件,在函数 wp_mkdir_p 的最开始,加入 Storage 地址的判断:
if ( substr($target, 0, 10) == 'saestor://' ) {
    return true;
}
如图所示:
修改完成后提交代码:
$ git add wp-config.php
$ git add wp-content
$ git add wp-includes/functions.php
$ git commit -s -m "Move wp-content to sae storage"
$ git push origin master:1
Username for 'https://git.sinacloud.com':
Password for 'guanqiao':
Counting objects: 5, done.
Delta compression using up to 4 threads.
Compressing objects: 100% (5/5), done.
Writing objects: 100% (5/5), 639 bytes | 639.00 KiB/s, done.
Total 5 (delta 4), reused 0 (delta 0)
To https://git.sinacloud.com/myblogger
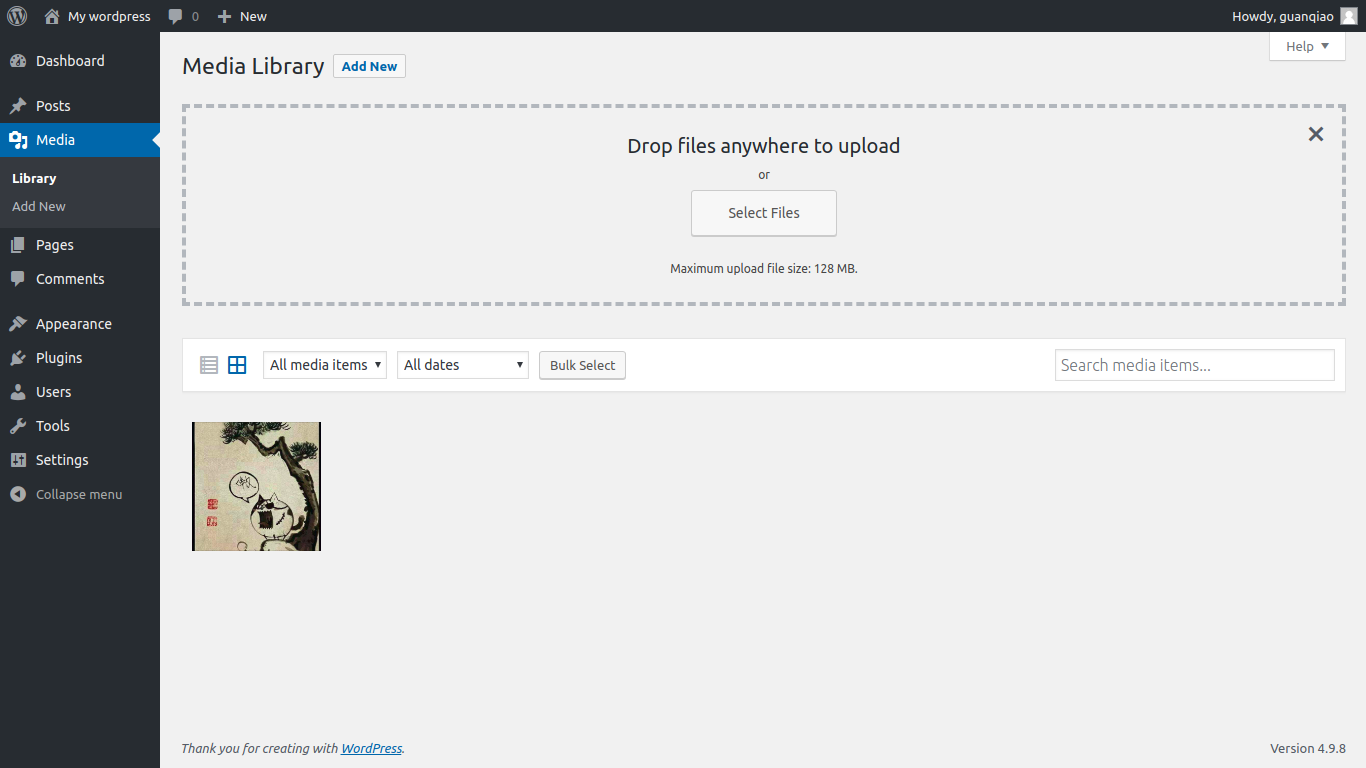
6588858..b74cedc master -> 1回到博客后台,现在上传图片正常了:
更多关于 Storage 的操作,参考 SAE Storage 帮助。
更换主题
WordPress 可以更换界面主题。除了官方自带的三个主题以外,用户还能在 WordPress 官方主题库或者第三方网站下载主题。
和图片上传遇到的问题一样,WordPress 主题也是放在代码目录下的,SAE 上无法直接更换主题。
由于之前在修改上传路径的时候,把 wp-content 目录移到了 SAE Storage 上,所以如果要更换主题,还需要单独设置一个主题目录。
修改 wp-includes/theme.php 文件,把里面所有的 WP_CONTENT_DIR 替换成 WP_LOCAL_CONTENT_DIR。
在 wp-config.php 中增加 WP_LOCAL_CONTENT_DIR 的定义:
define('WP_LOCAL_CONTENT_DIR', dirname(__FILE__) . '/wp-content');如图所示:
接下来只需要从官网下载相应的主题 ZIP 包,解压到工程的 wp-content/themes 目录下,再重新部署代码:
$ git add wp-content/themes/minimal-2017
$ git commit -s -m "Add a new theme named minimal-2017"
$ git push origin master:1
Username for 'https://git.sinacloud.com':
Password for 'guanqiao':
Counting objects: 30, done.
Delta compression using up to 4 threads.
Compressing objects: 100% (24/24), done.
Writing objects: 100% (30/30), 706.77 KiB | 19.63 MiB/s, done.
Total 30 (delta 4), reused 0 (delta 0)
To https://git.sinacloud.com/myblogger
   5379c5c..9f2d5a2  HEAD -> 1
后台的主题目录就可以看到新主题了:
安装插件
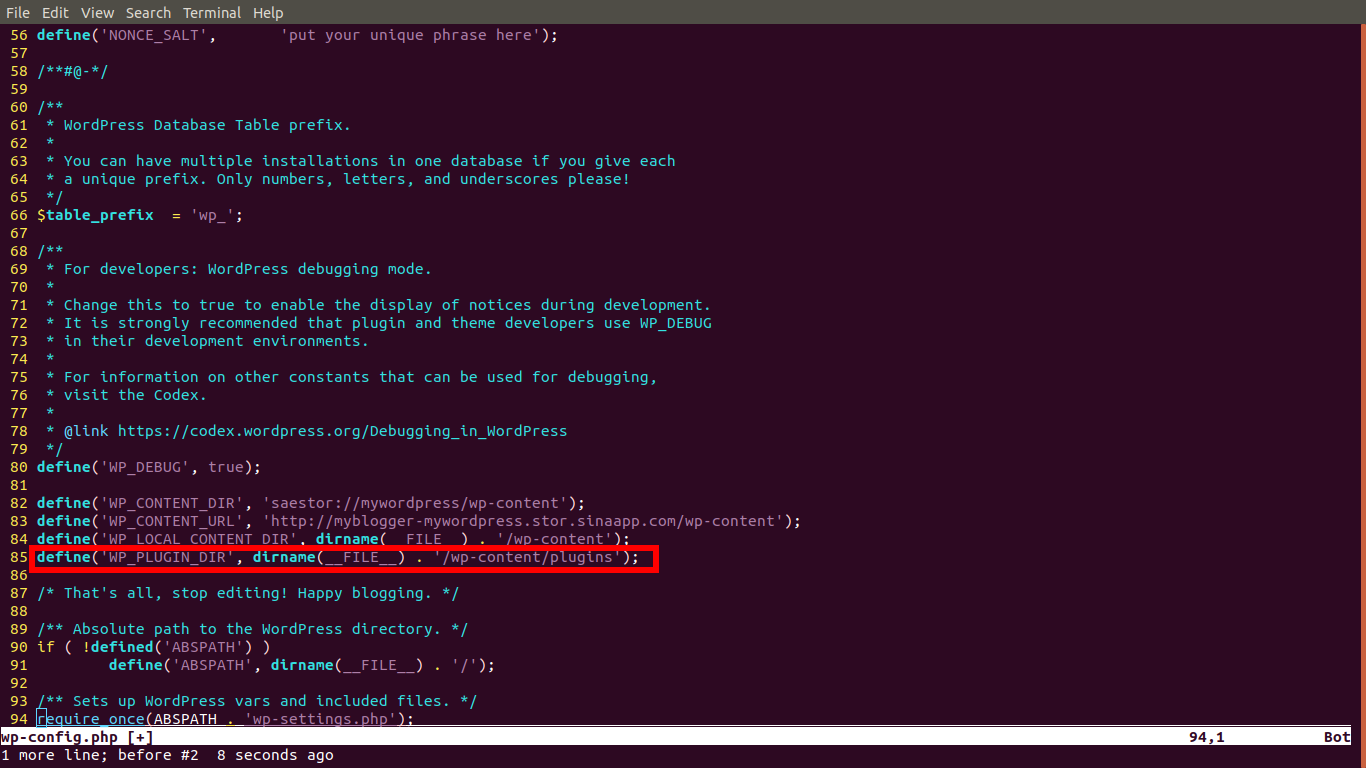
插件安装方法和主题类似,在 wp-config.php 中重新指定插件目录:
define('WP_PLUGIN_DIR', dirname(__FILE__) . '/wp-content/plugins');如图所示:
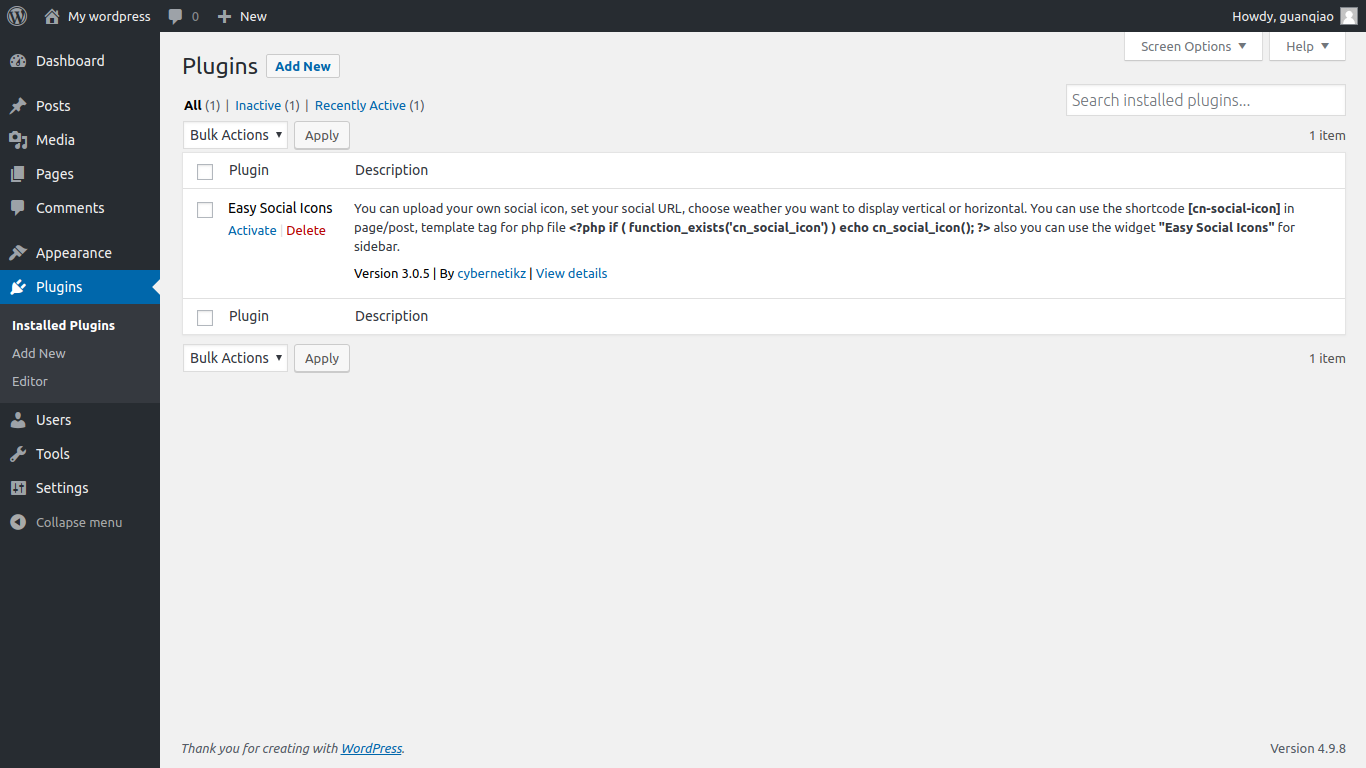
从 WordPress 官方插件库下载插件的 ZIP 包,解压放到工程下的 wp-content/plugins 目录,再重新部署代码:
$ git add wp-content/plugins/easy-social-icons/
$ git commit -s -m "Add a new plugin named easy-social-icons"
$ git push origin master:1
Username for 'https://git.sinacloud.com':
Password for 'guanqiao':
Counting objects: 54, done.
Delta compression using up to 4 threads.
Compressing objects: 100% (52/52), done.
Writing objects: 100% (54/54), 1.26 MiB | 1.15 MiB/s, done.
Total 54 (delta 1), reused 0 (delta 0)
To https://git.sinacloud.com/myblogger
   72b353c..01782d7  master -> 1
新装的插件就出现在了后台: