Setting Up a WordPress Blog in the SAE Standard Environment
WordPress is one of the most popular personal blogging platforms today. Developed in PHP, it is lightweight, simple, and feature-complete. On Sina Cloud, you can use WordPress to quickly set up your own personal blog.
All of the following steps are performed on Ubuntu. The tools involved include Git, Firefox/Chrome, and tar. These tools are also available in the software repositories for macOS and the official Ubuntu subsystem on Windows; Windows also has corresponding alternative tools.
Create an SAE Application
On the Sina Cloud (sae.sina.com.cn) homepage, under application management, choose to create a new application:
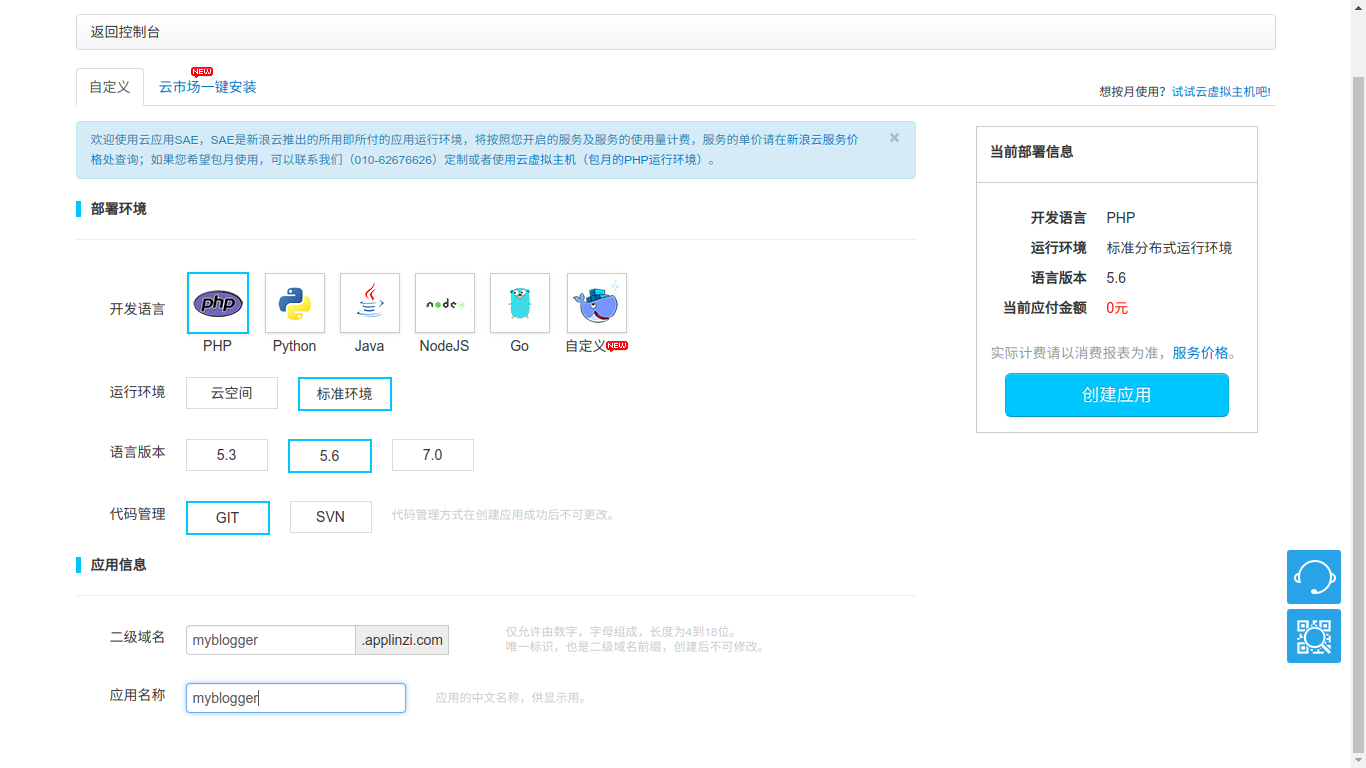
Choose PHP as the development language.
Choose the standard environment as the runtime environment.
For language version and code management, choose PHP 5.6 and use Git to manage the code.
Enter the newly created application page and click Overview in the sidebar. You can see the application's details:
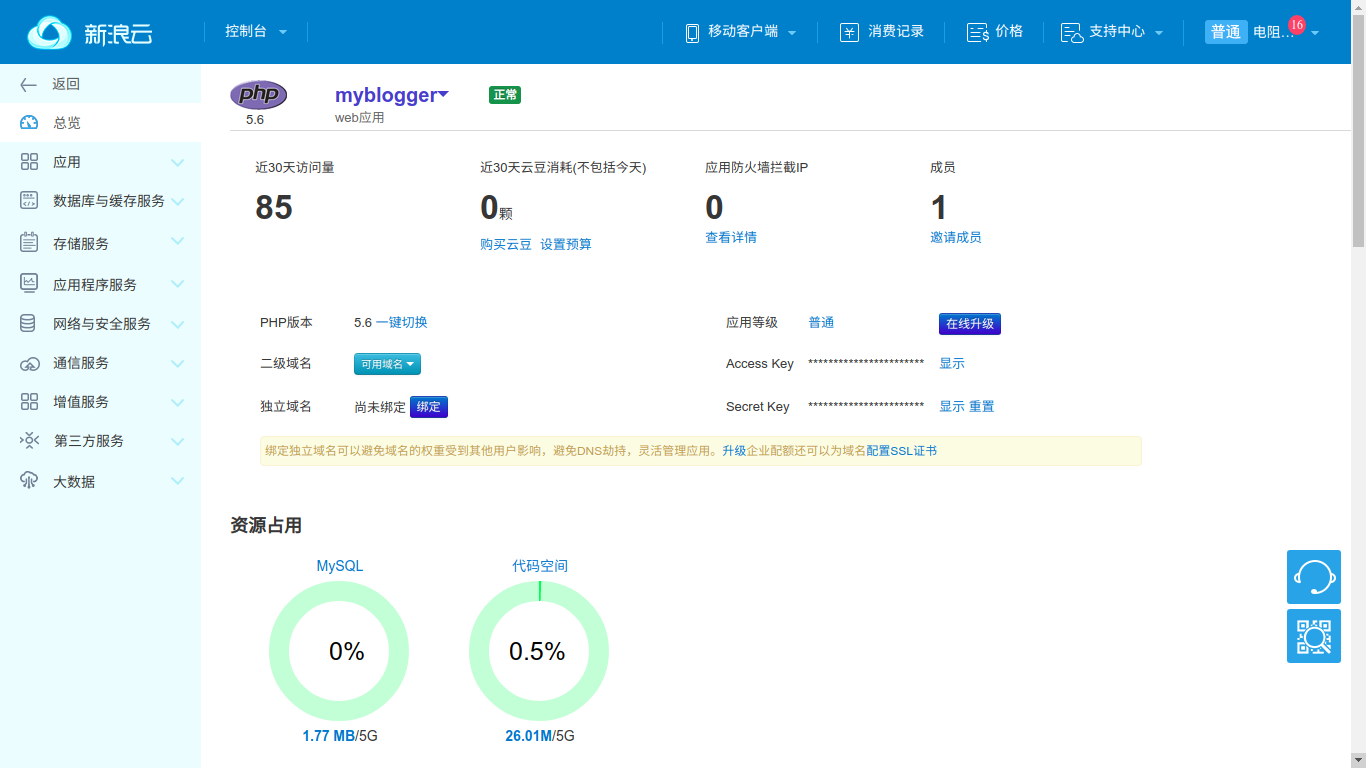
A cloud application does not need an independent domain name; you can directly access it through the subdomain you just registered. For example, you can now enter the newly registered application domain in your browser: http://myblogger.applinzi.com:

Of course, the cloud application is still empty at this point.
Deploy the Code
Download the latest version of WordPress from the official website at https://wordpress.org/latest.tar.gz. The version at the time was 4.9.8; in actual use, you can download the latest stable version provided by the official website and use the corresponding local filename.
Extract WordPress into your working directory:
$ tar xf wordpress-4.9.8.tar.gzCreate a local Git repository:
$ cd wordpress
$ git init
Initialized empty Git repository in /home/guanqiao/Workspace/wordpress/.git/
$ git add .
$ git commit -s -m "Init my wordpress"
Link the local code to SAE's remote Git repository:
$ git remote add origin https://git.sinacloud.com/mybloggerYou can find the SAE Git repository information on the application's code management page:
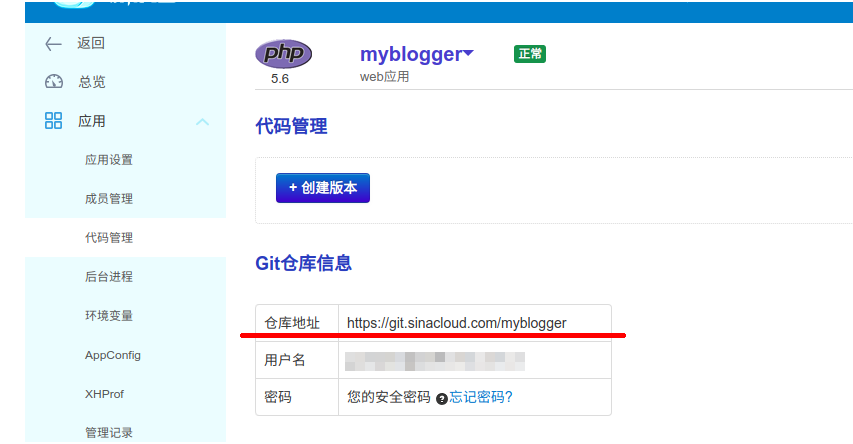
Finally, push the local code to version 1 on the SAE Git server:
$ git push origin master:1
Username for 'https://git.sinacloud.com':
Password for 'guanqiao':
Counting objects: 1636, done.
Delta compression using up to 4 threads.
Compressing objects: 100% (1611/1611), done.
Writing objects: 100% (1636/1636), 8.54 MiB | 550.00 KiB/s, done.
Total 1636 (delta 166), reused 0 (delta 0)
To https://git.sinacloud.com/myblogger
 * [new branch]      master -> 1
Note that the password here is not the login password, but the security password.
Visit your application address in the browser, and you should see that WordPress has been uploaded successfully.
For more about code deployment, refer to SAE's code deployment manual.
Create the Database
WordPress still cannot be accessed normally at this point; the page will indicate that there is no database in the backend.
On the SAE application page, click Database and Cache Services, then choose Shared MySQL. The page is empty, which means the application does not yet have a database.
Click Create MySQL:
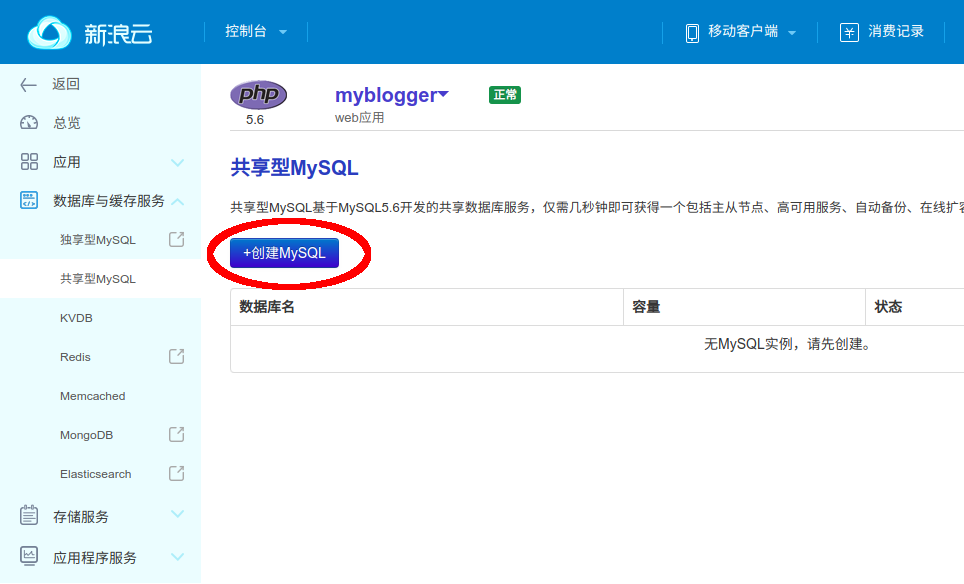
Because this is a shared MySQL database, the database name is generated automatically.
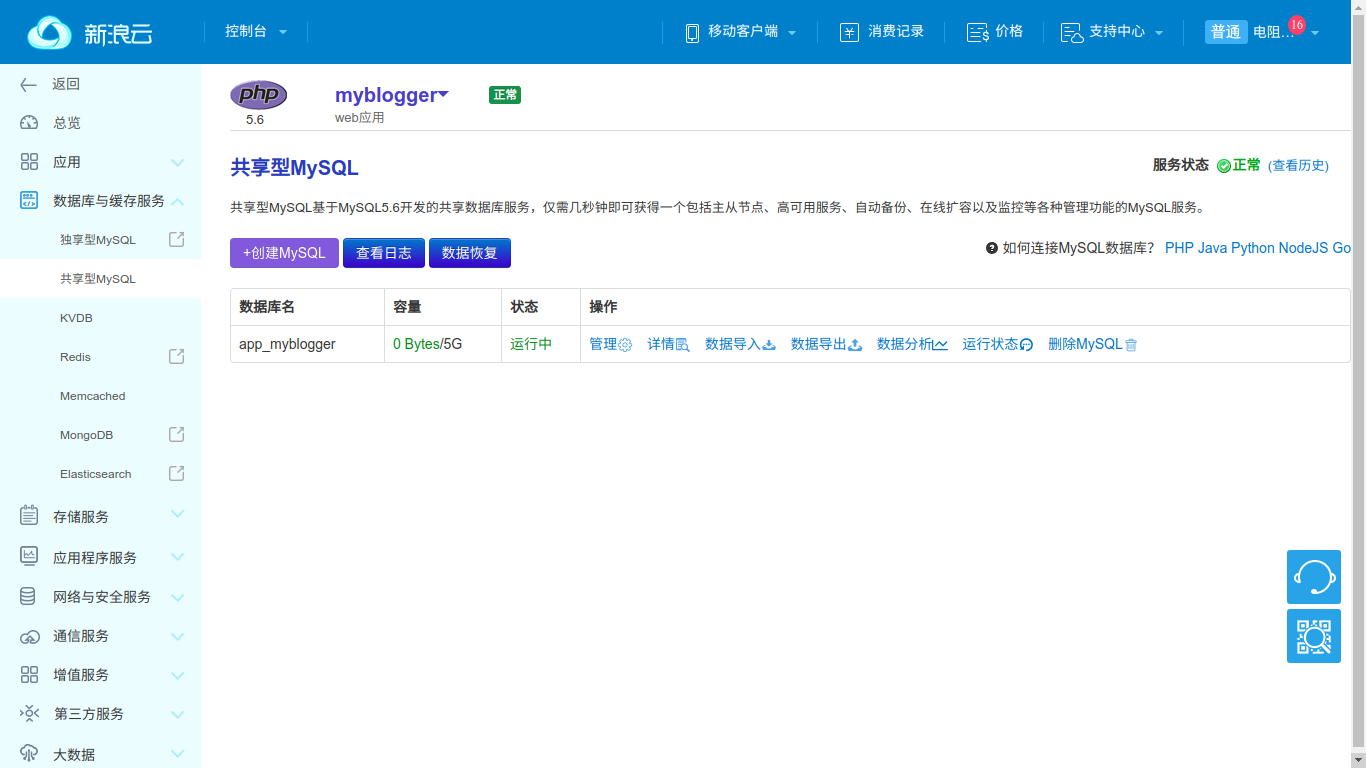
Click the Details link under database operations to see the database details.

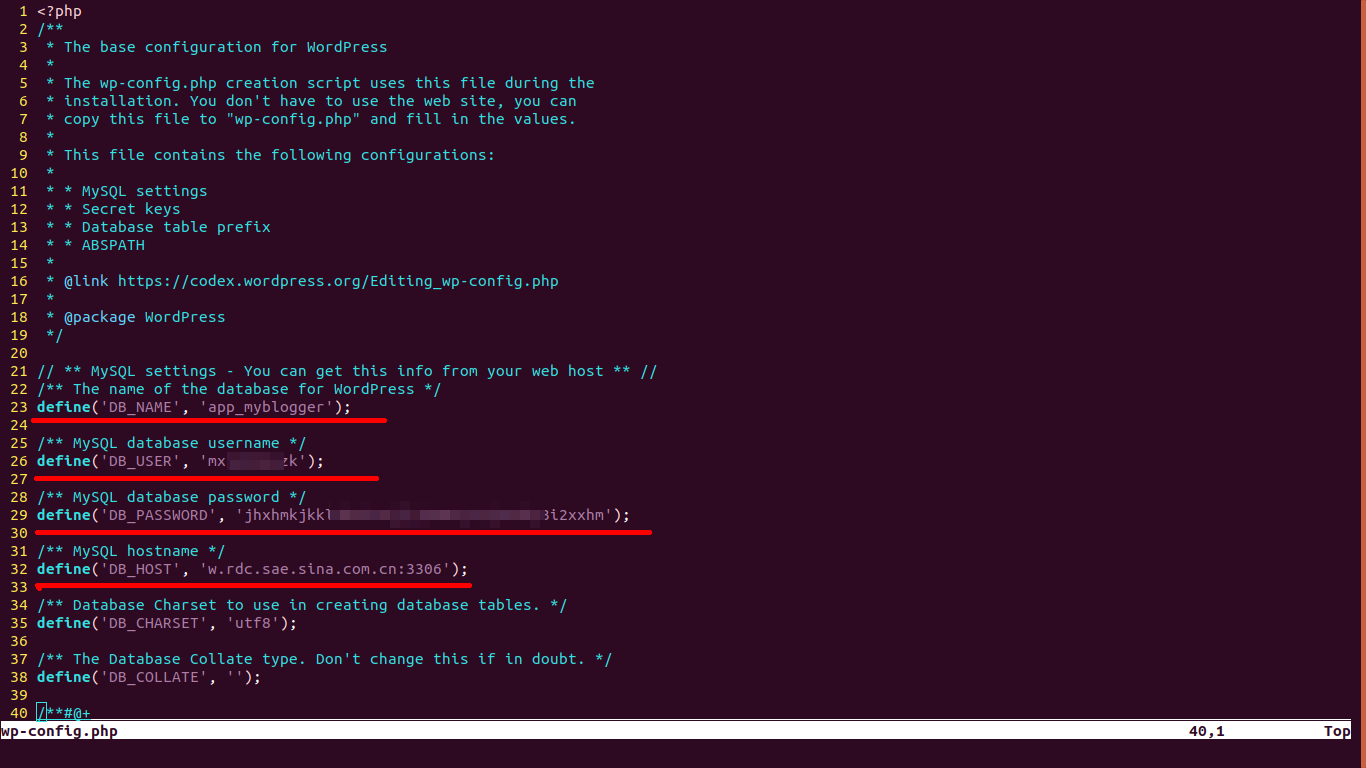
Return to the WordPress project directory and create wp-config.php from the official wp-config-sample.php:
$ cp wp-config-sample.php wp-config.phpModify wp-config.php and fill in the database information generated by SAE:
Commit and deploy the code again:
$ git add wp-config.php
$ git commit -s -m "Add wp-config.php"
$ git push origin master:1
Username for 'https://git.sinacloud.com':
Password for 'guanqiao':
Counting objects: 3, done.
Delta compression using up to 4 threads.
Compressing objects: 100% (3/3), done.
Writing objects: 100% (3/3), 1.51 KiB | 1.51 MiB/s, done.
Total 3 (delta 1), reused 0 (delta 0)
To https://git.sinacloud.com/myblogger
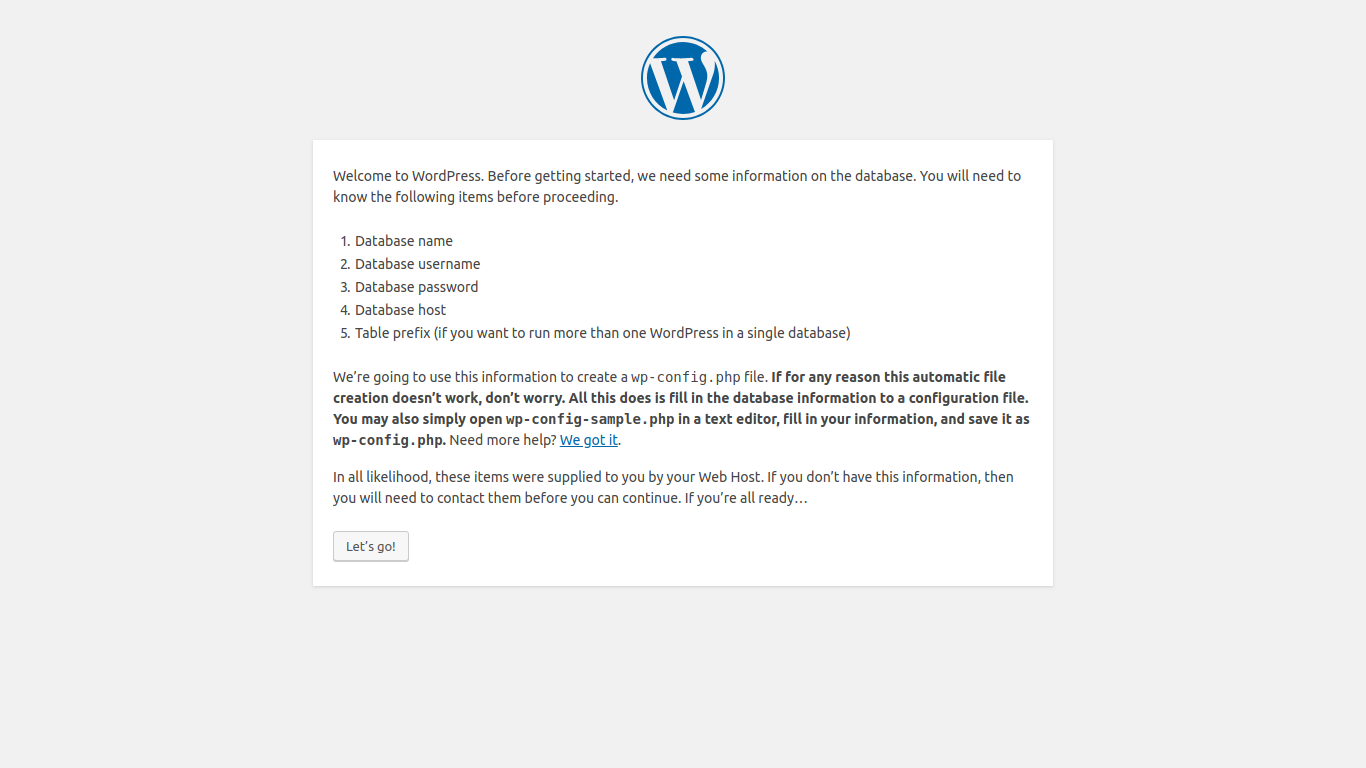
852f9e5..8122bfc master -> 1Now, when you visit your application address in the browser, the page will become the WordPress initialization page.
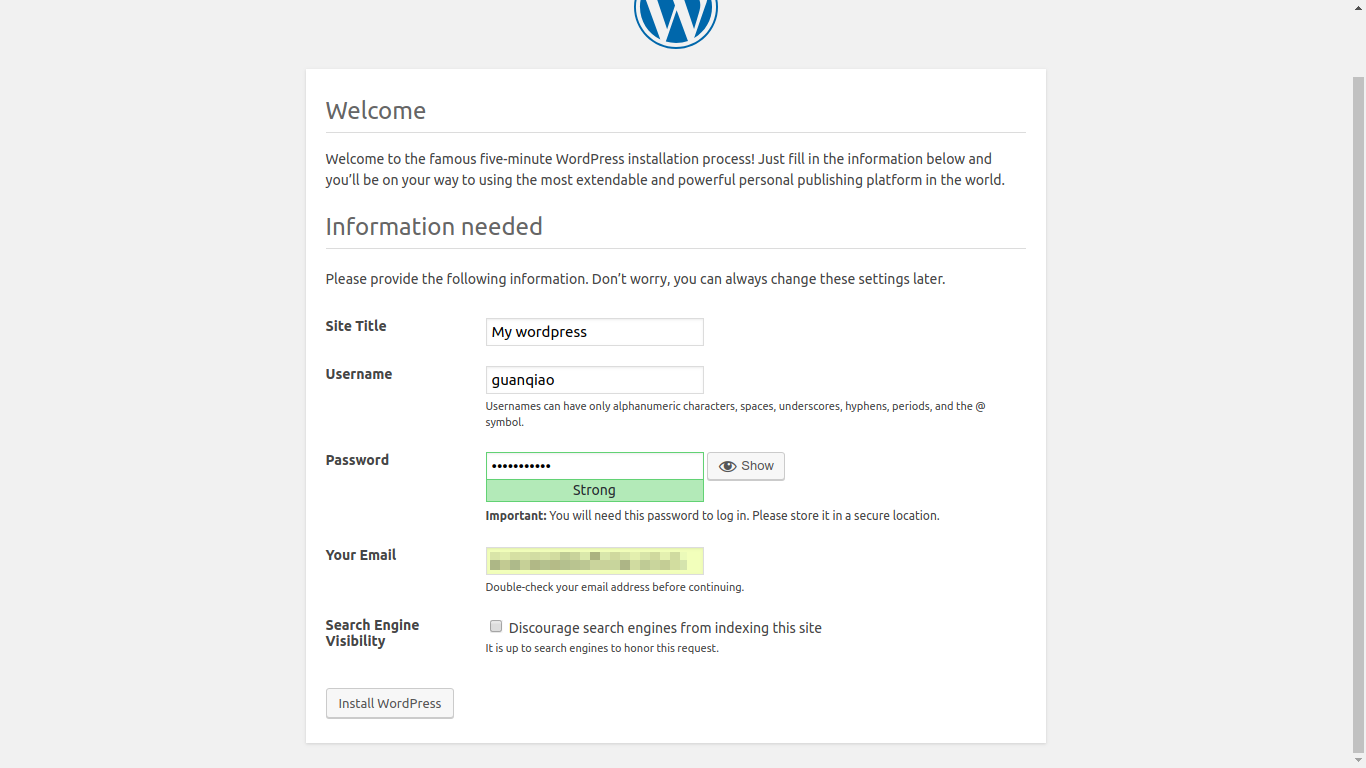
The fields on the page are the blog title and the backend administrator's username and password. If you are using the official default configuration, the blog's admin address is usually https://{application subdomain}/wp-admin.
For example, here it is: http://myblogger.applinzi.com/wp-admin.
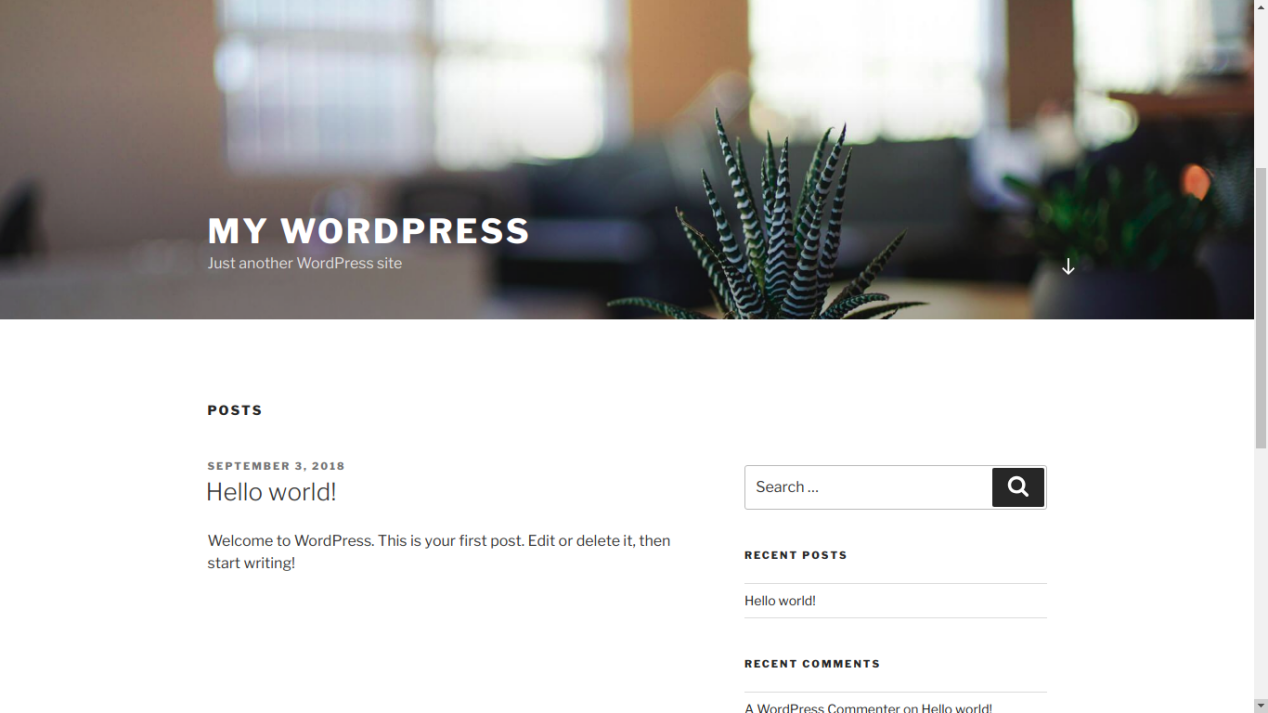
After submitting the page, enter your application address in the browser again, and the personal blog homepage will be displayed.
Use SAE Storage
In the backend of the new blog, you can write and publish posts, but there should now be a problem: uploading images always reports a failure.

By default, WordPress uploads images to a directory under the code directory. If the runtime environment is the standard environment, the application cannot directly modify its own code directory. This is a characteristic of the distributed architecture of the SAE standard environment.
For this, SAE provides Storage.
SAE Storage is a distributed file storage service used to store persistent files. It supports text, multimedia, binary files, and any other type of data. WordPress resources can be placed entirely in Storage.
Enter the application page, choose Storage under storage services, and click New Bucket. The Bucket name is specified by the user.
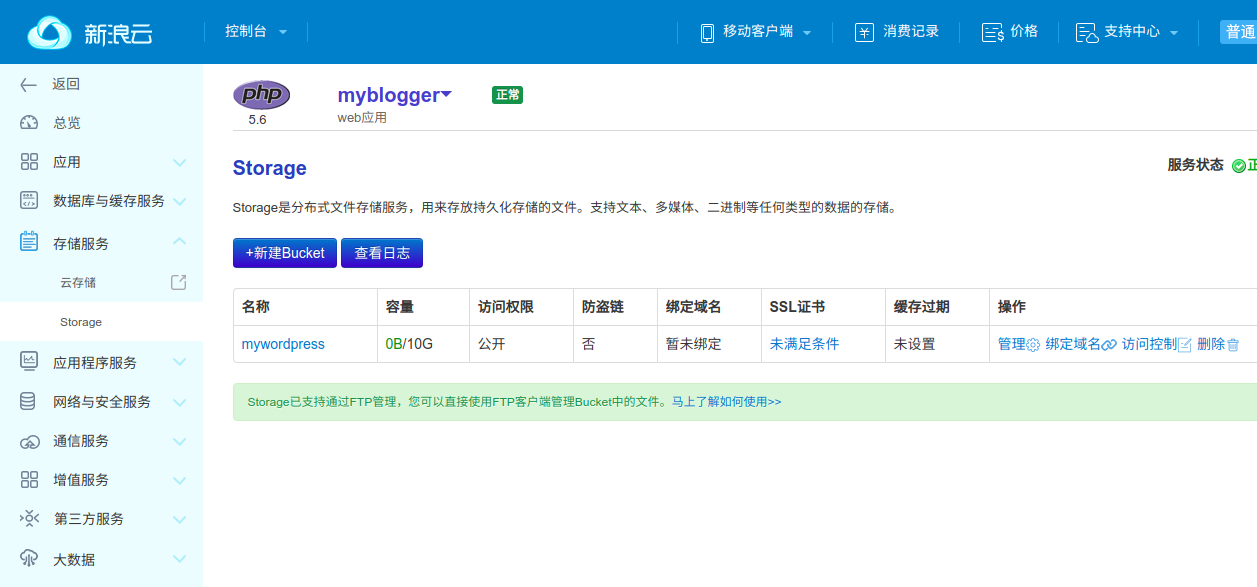
You can see that a Storage Bucket provides 10 GB of space.
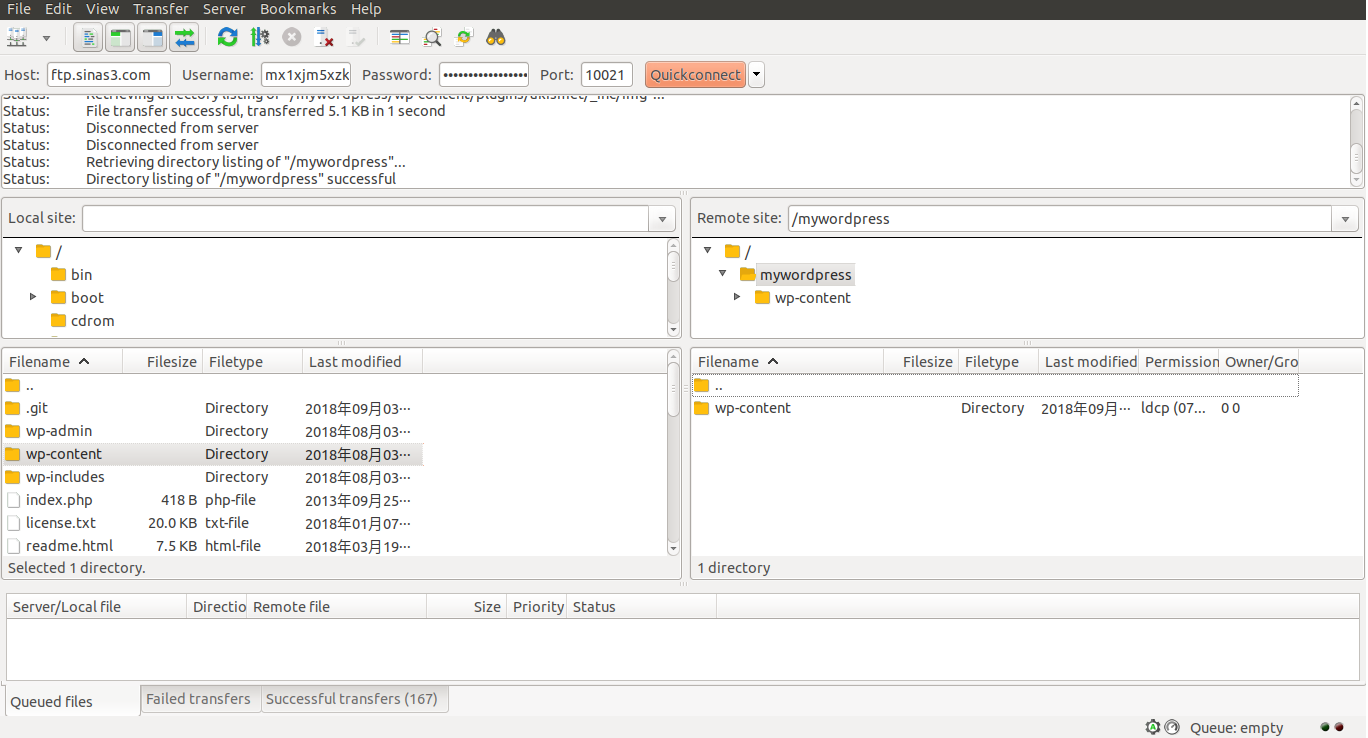
At the time, Storage supported FTP login. The FTP server connection information was as follows:
地址:ftp.sinas3.com
端口:10021
用户名:应用的 AccessKey
密码:应用的 SecretKey
The username and password here are on the application's Overview page.
Use the FTP client FileZilla to upload wp-content from the WordPress project directory to the application's Storage. Pay attention to the Bucket directory name here; do not upload the files to the root directory of Storage:
Then modify the wp-config.php file and add the Storage definitions after define('WP_DEBUG', false);:
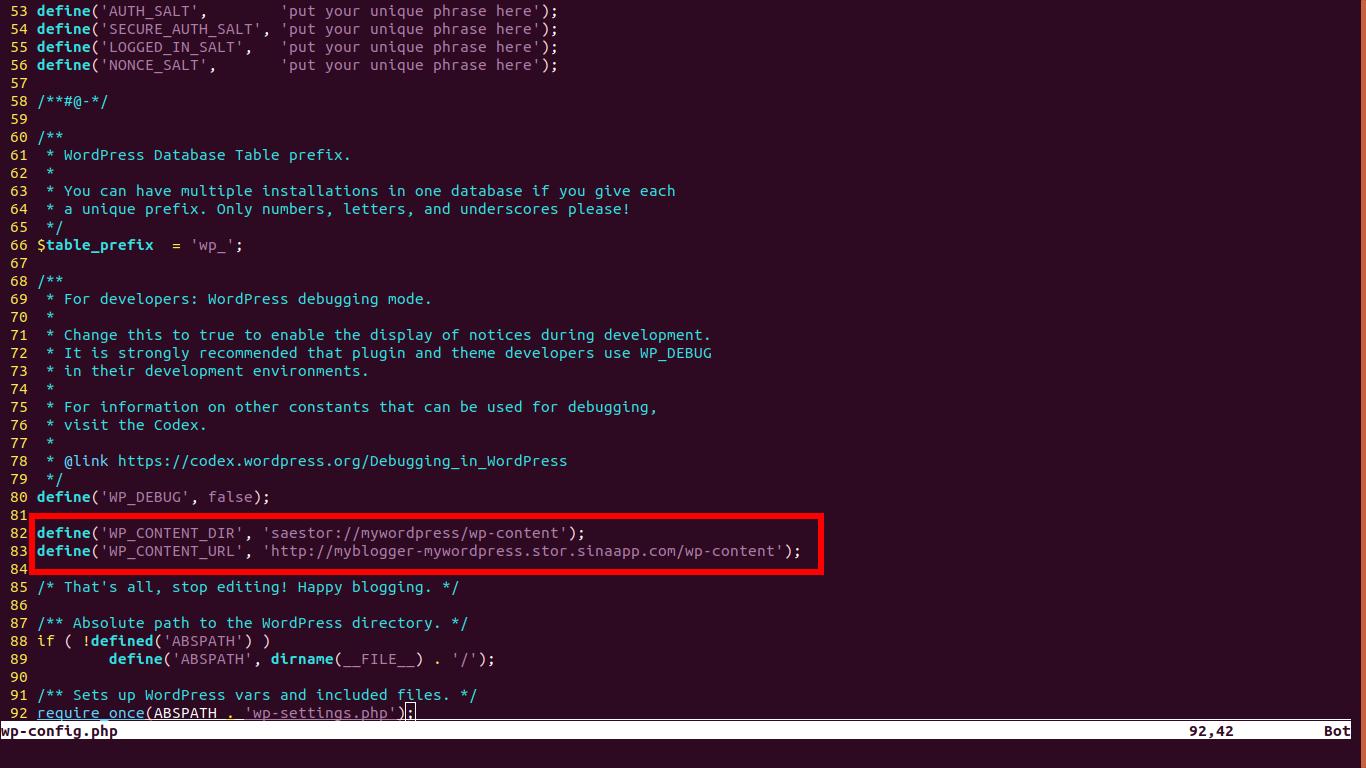
The format of WP_CONTENT_DIR is:
define('WP_CONTENT_DIR', 'saestor://{bucket名}/wp-content');The format of WP_CONTENT_URL is:
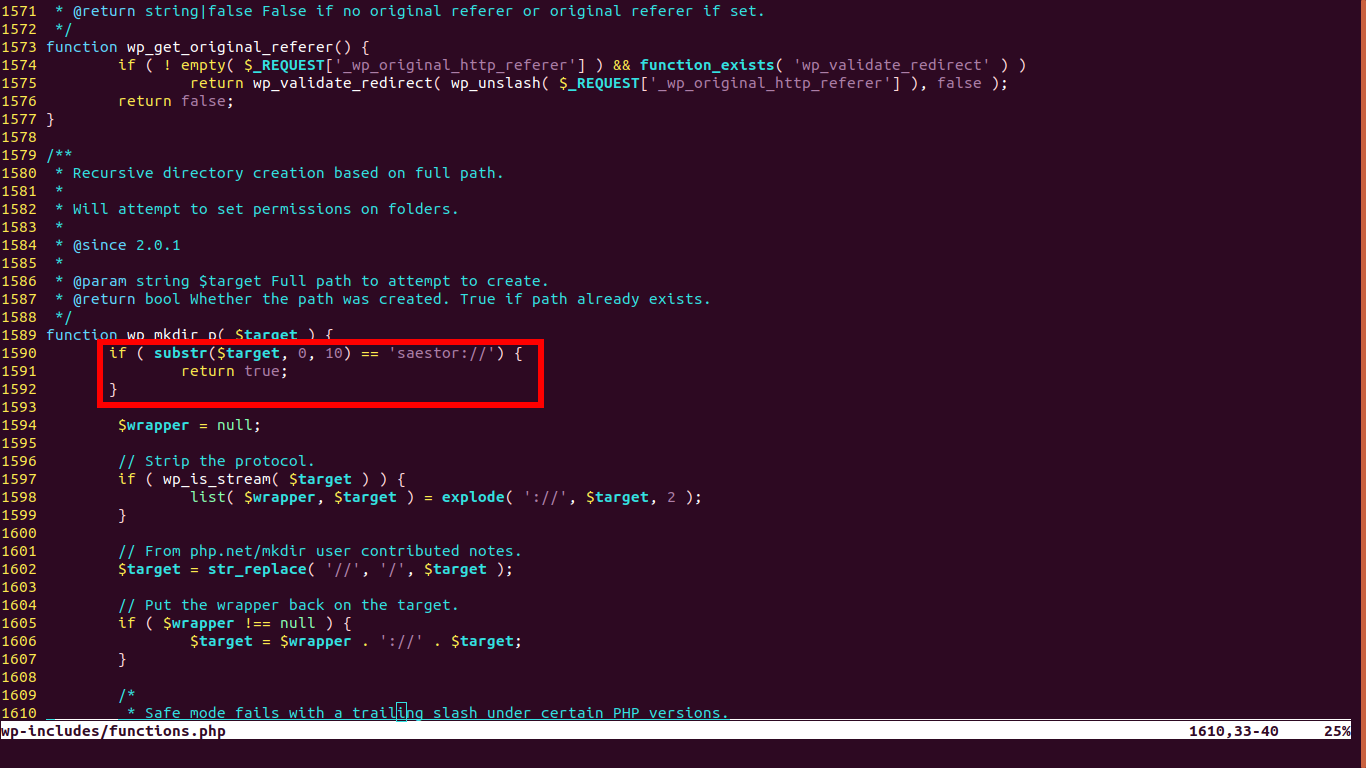
define('WP_CONTENT_URL', 'http://{应用名}-{bucket名}.stor.sinaapp.com/wp-content');Next, modify the wp-includes/functions.php file. At the very beginning of the wp_mkdir_p function, add a check for the Storage address:
if ( substr($target, 0, 10) == 'saestor://' ) {
    return true;
}
As shown here:
After the changes are complete, commit the code:
$ git add wp-config.php
$ git add wp-content
$ git add wp-includes/functions.php
$ git commit -s -m "Move wp-content to sae storage"
$ git push origin master:1
Username for 'https://git.sinacloud.com':
Password for 'guanqiao':
Counting objects: 5, done.
Delta compression using up to 4 threads.
Compressing objects: 100% (5/5), done.
Writing objects: 100% (5/5), 639 bytes | 639.00 KiB/s, done.
Total 5 (delta 4), reused 0 (delta 0)
To https://git.sinacloud.com/myblogger
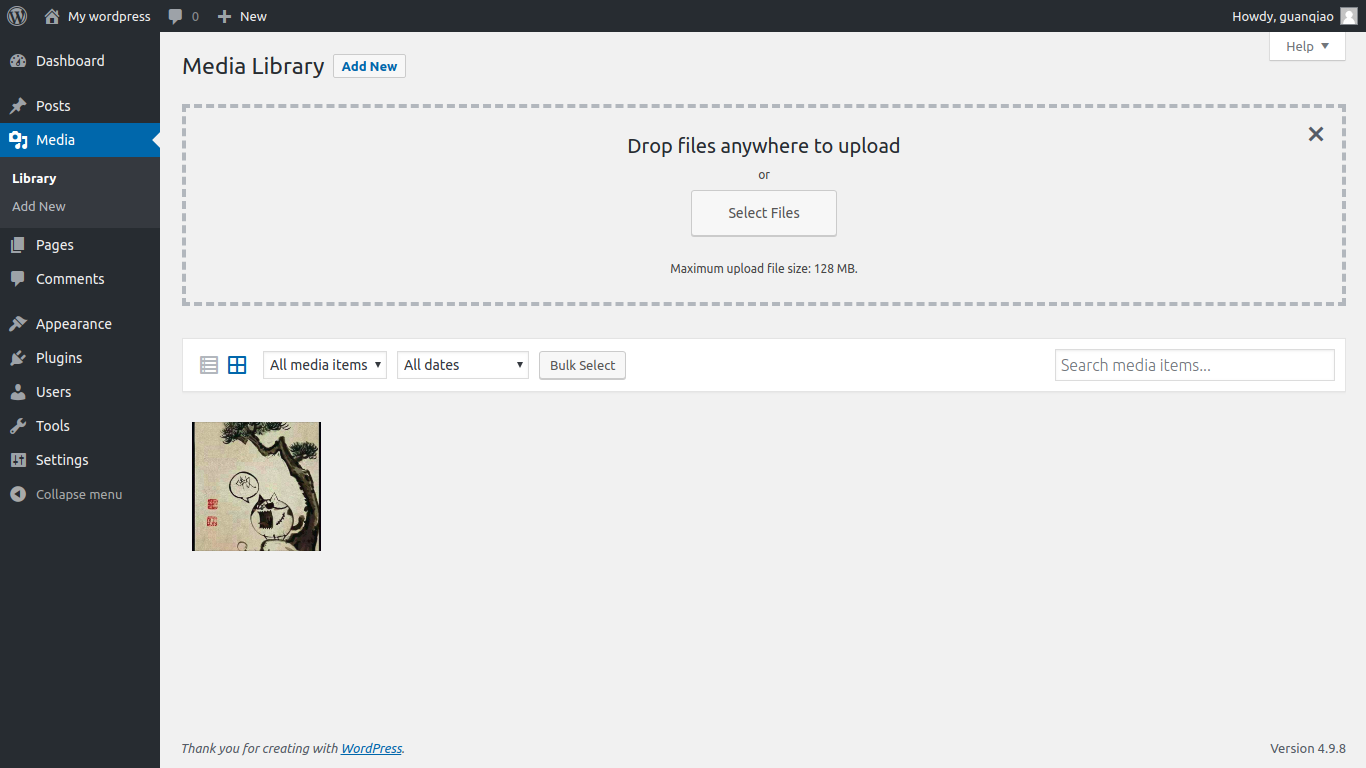
6588858..b74cedc master -> 1Return to the blog backend, and image uploads should now work normally:
For more operations related to Storage, refer to SAE Storage Help.
Change the Theme
WordPress can change its interface theme. In addition to the three themes bundled officially, users can also download themes from the official WordPress theme repository or third-party websites.
As with the image upload problem, WordPress themes are also stored under the code directory, so themes cannot be changed directly on SAE.
Since the wp-content directory was moved to SAE Storage earlier when modifying the upload path, if you want to change themes, you also need to set a separate theme directory.
Modify the wp-includes/theme.php file and replace all instances of WP_CONTENT_DIR with WP_LOCAL_CONTENT_DIR.
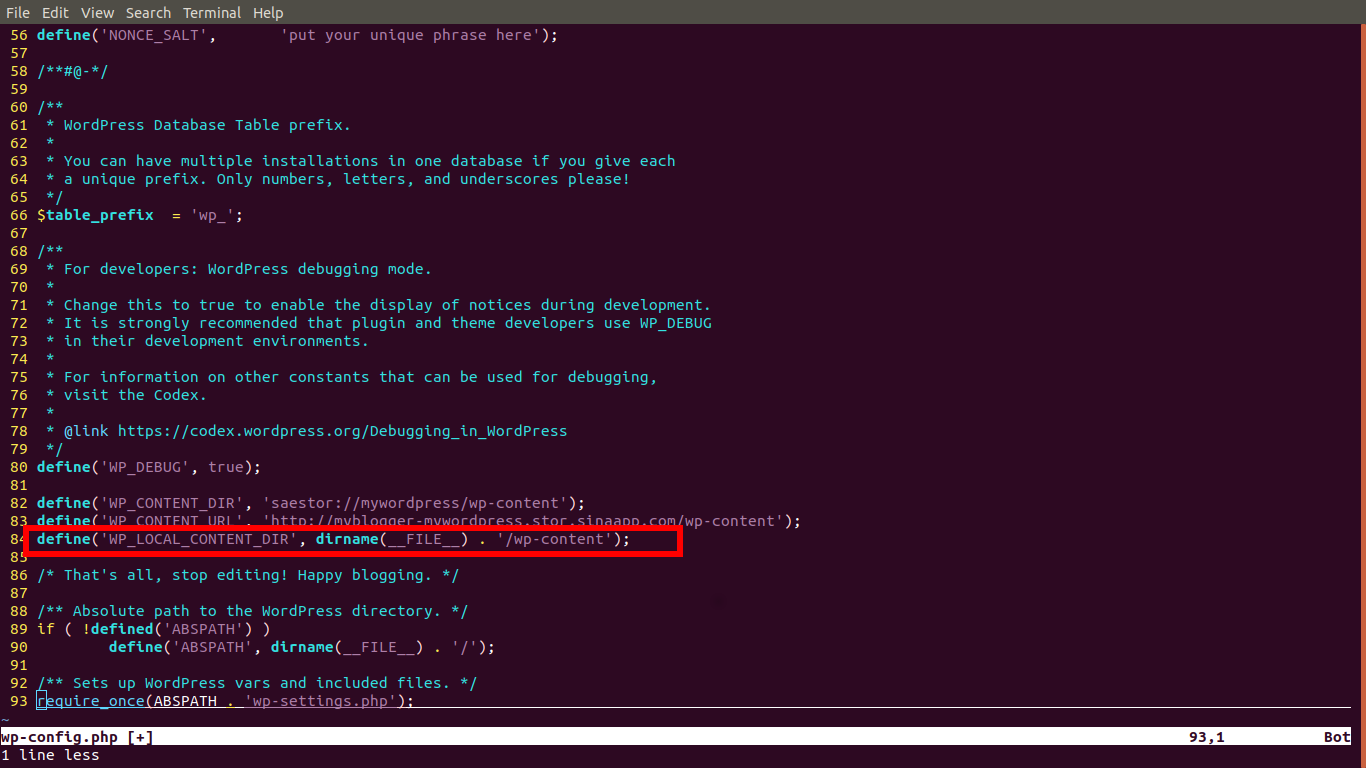
Add the definition of WP_LOCAL_CONTENT_DIR to wp-config.php:
define('WP_LOCAL_CONTENT_DIR', dirname(__FILE__) . '/wp-content');As shown here:
Next, you only need to download the corresponding theme ZIP package from the official website, extract it into the project's wp-content/themes directory, and redeploy the code:
$ git add wp-content/themes/minimal-2017
$ git commit -s -m "Add a new theme named minimal-2017"
$ git push origin master:1
Username for 'https://git.sinacloud.com':
Password for 'guanqiao':
Counting objects: 30, done.
Delta compression using up to 4 threads.
Compressing objects: 100% (24/24), done.
Writing objects: 100% (30/30), 706.77 KiB | 19.63 MiB/s, done.
Total 30 (delta 4), reused 0 (delta 0)
To https://git.sinacloud.com/myblogger
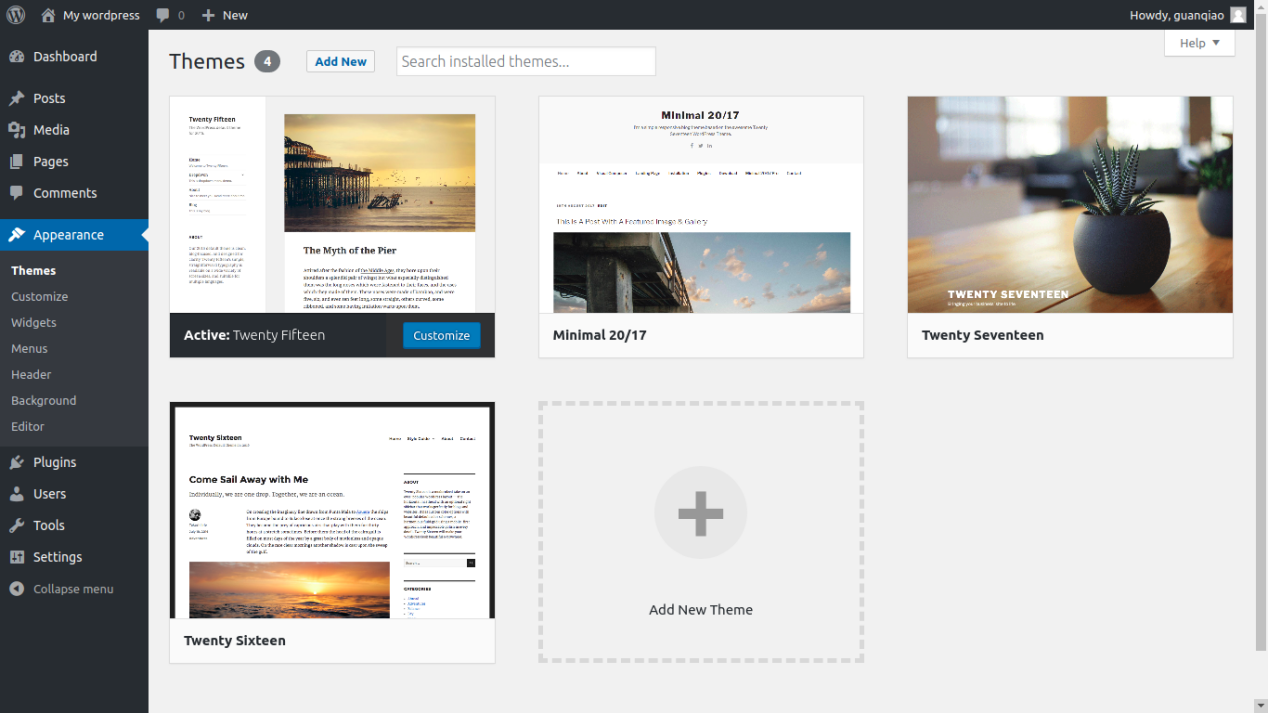
5379c5c..9f2d5a2 HEAD -> 1The new theme will then appear in the backend theme directory:
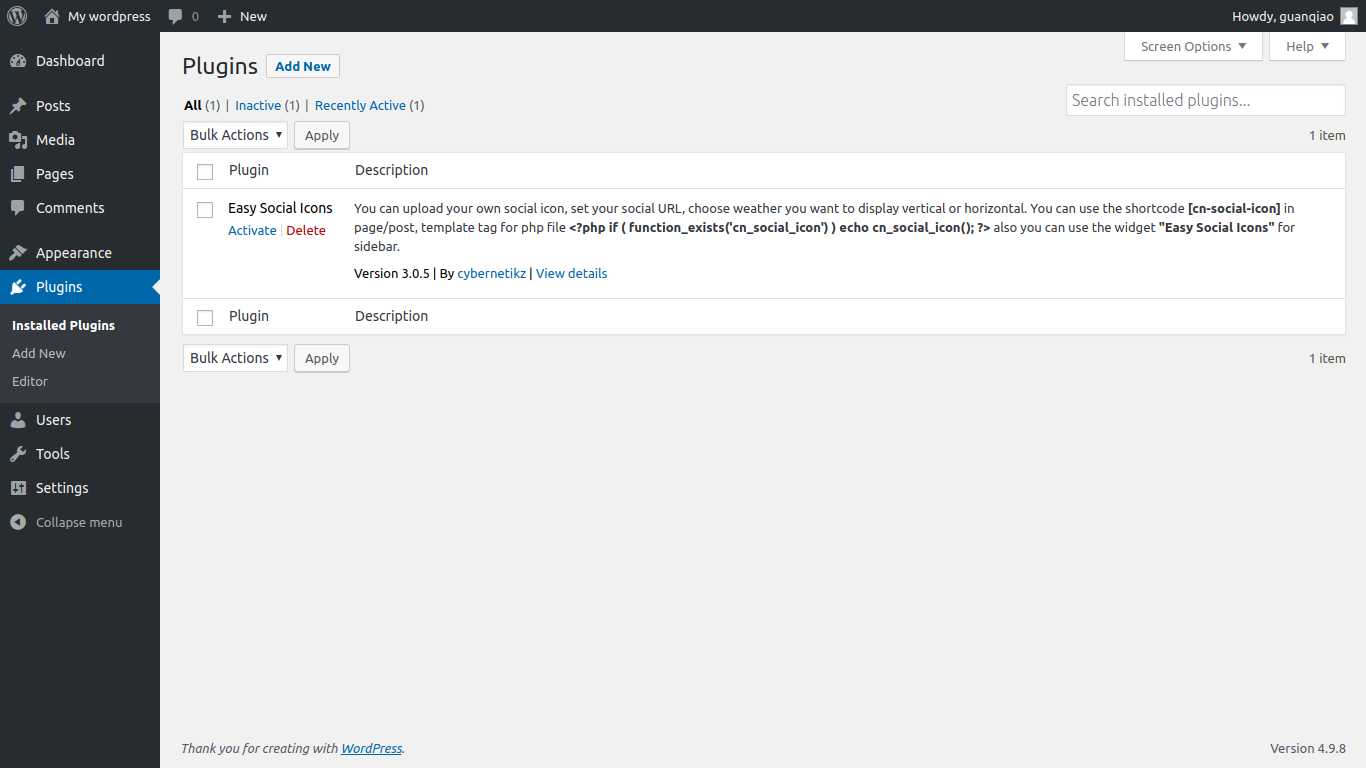
Install Plugins
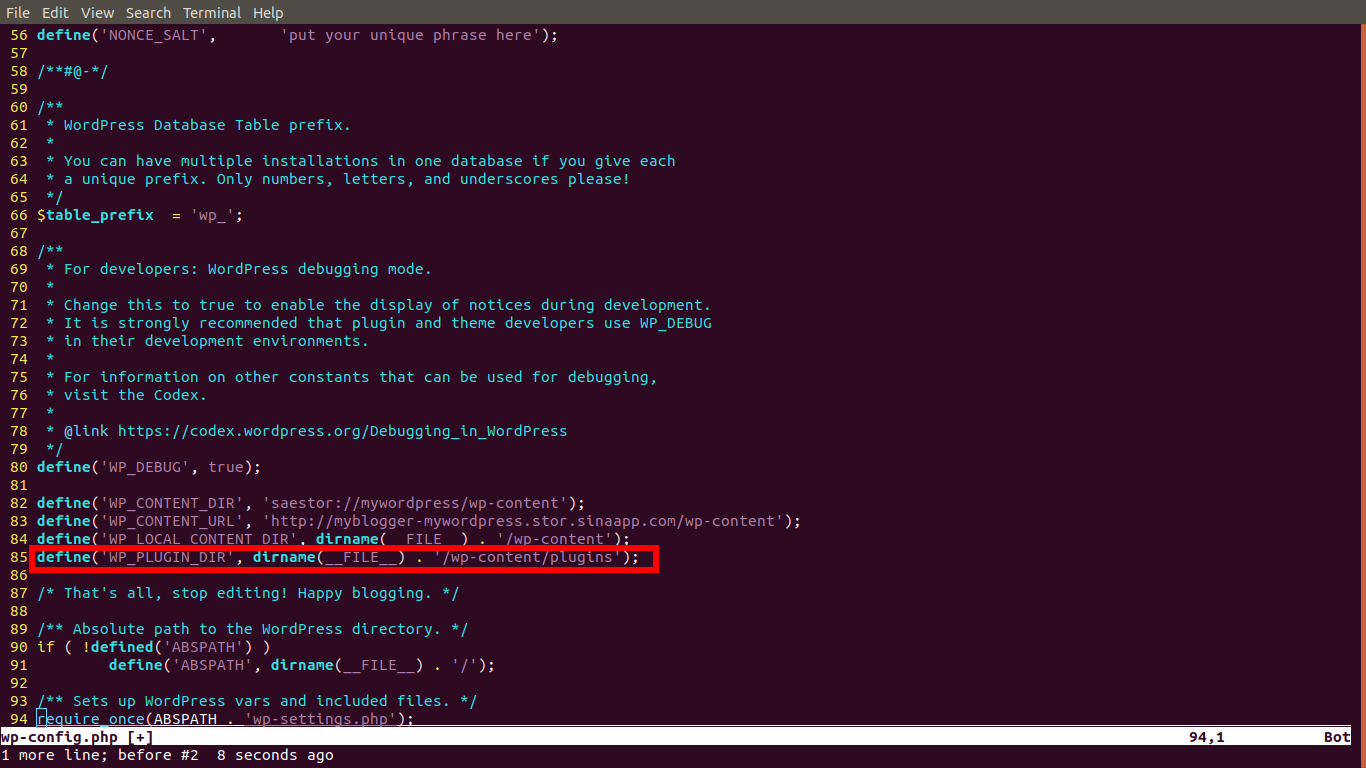
The plugin installation method is similar to themes. Redefine the plugin directory in wp-config.php:
define('WP_PLUGIN_DIR', dirname(__FILE__) . '/wp-content/plugins');As shown here:
Download the plugin ZIP package from the official WordPress plugin repository, extract it into the project's wp-content/plugins directory, and redeploy the code:
$ git add wp-content/plugins/easy-social-icons/
$ git commit -s -m "Add a new plugin named easy-social-icons"
$ git push origin master:1
Username for 'https://git.sinacloud.com':
Password for 'guanqiao':
Counting objects: 54, done.
Delta compression using up to 4 threads.
Compressing objects: 100% (52/52), done.
Writing objects: 100% (54/54), 1.26 MiB | 1.15 MiB/s, done.
Total 54 (delta 1), reused 0 (delta 0)
To https://git.sinacloud.com/myblogger
   72b353c..01782d7  master -> 1
The newly installed plugin will then appear in the backend: