
It is actually very simple.
First, set up the ASIAIR: connect the ASIAIR to the main camera, guide camera, and equatorial mount; then connect the EAF and EFW to the main camera.
P.S. I use an EQ6-R. At first I connected through the hand controller, which required a one-star alignment every time; later I discovered that using an EQMOD cable is much nicer.
After all the cables are connected, power everything on. Search for the ASIAIR Wi-Fi and connect to it, then open the ASIAIR app and you should be able to connect to the device. Once connected, tap the settings button in the upper-right corner and choose the first menu, the one with the Wi-Fi icon. Find “Bridge Mode” below (called Home Station in the English menu), open it, then search for and connect to your home Wi-Fi.
P.S. My telescope is on the third-floor roof, where the signal is fairly weak, so I added a bridge in between. On a TP-LINK router, go to Wireless Settings, choose WDS, scan, and connect. When setting up the bridge, remember to change the bridge router’s IP to the same subnet as the main router. For example, if the main router is 192.168.1.1, the bridge router can be set to 192.168.1.2. After WDS is connected, remember to disable DHCP on the bridge router. Many newer routers automate this now, so you may not need to remember these details.
P.P.S. Remember to set a password for the Wi-Fi. ASIAIR cannot connect to Wi-Fi without a password. It cannot connect!!! One more complaint: Wi-Fi networks that have been connected before cannot be forgotten. How is someone with OCD supposed to tolerate that? Tolerate that!!!
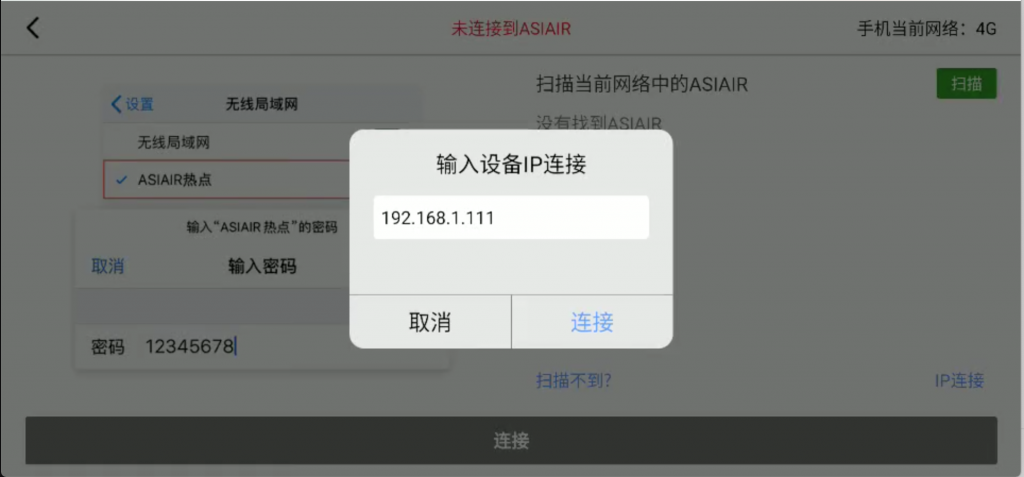
After the bridge is set up, switch your phone’s Wi-Fi to the same Wi-Fi network, or the same subnet, or any LAN as long as it can ping through. If it is not on the same subnet, ASIAIR may not be discoverable. In that case, choose IP connection at the lower right of the screen and enter the ASIAIR’s IP address.
When we are away from home and want to connect to the ASIAIR, all we need to do is make the network we are on and the network where the ASIAIR is located form one LAN. So-called remote networking is essentially a VPN: it establishes a virtual tunnel. You only need to set up a VPN server at home, then connect to it while you are away.
However, many home broadband connections these days are nested deep inside private networks and no longer have public IP addresses. Of course, you can also use DDNS. PeanutHull provides DDNS service. The Pgy VPN I use is also one of their products. If P2P cannot connect, the relay speed is 2M. These days, as long as you are willing to pay, the speed should become acceptable.
The ASIAIR still connects to the original home Wi-Fi, either the main router or the bridge router.
Setting up Pgy VPN is fairly troublesome. I use the Pgy X1.
In short: power it on, then connect your phone to the X1’s Wi-Fi. Once connected, open 10.168.1.1 or p.oray.com in a browser. I recommend switching to desktop browsing mode, or just opening it on a computer.
At the beginning there will be a series of steps. Just follow them. Here is the official tutorial; you should be fine following it:
http://service.oray.com/question/8343.html
There are three things to note:
- WAN port forwarding must be enabled in the settings interface.
- The bypass route must be configured. Use the computer interface; the automatically added one is fine.
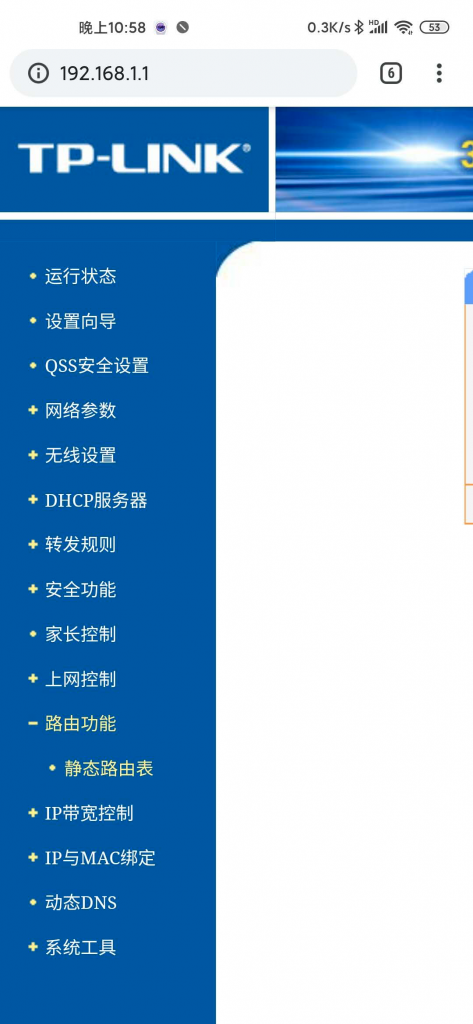
- The routing table on your original home Wi-Fi main router also needs to be configured.
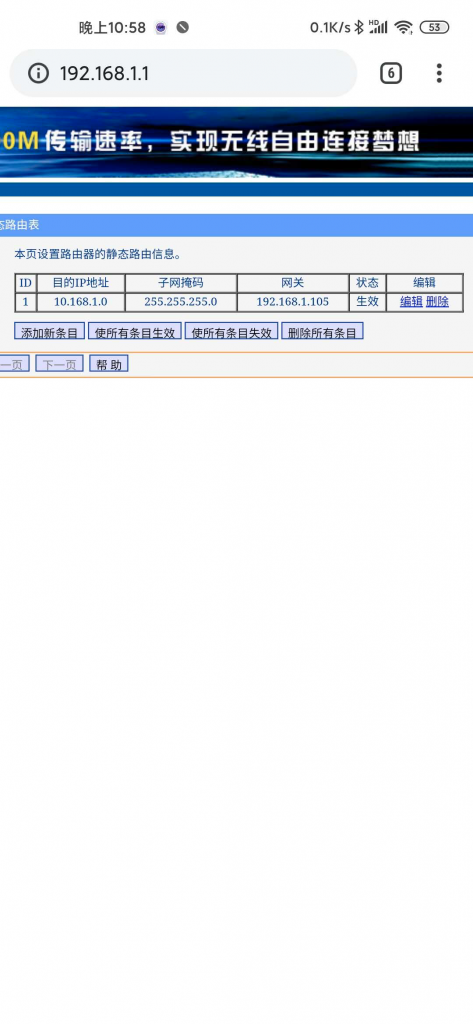
If the Pgy VPN IP is 192.168.1.105, using TP-LINK as an example, first find the following menu:
The setting below means: for IP addresses going to the target network segment, that is, the Pgy router’s network segment 10.168.1.0/255.255.255.0, first look for 192.168.1.105; once found, send traffic out from there.
The network segment 10.168.1.0/255.255.255.0 can also be written as 10.168.1.0/24. That is because each number in the subnet mask is 8 bits; written in binary, there are 24 1s, followed by 8 0s. In plain terms, the first 24 bits of 10.168.1.0 represent one network segment, namely 00001010 10101000 00000001 (I did not write that wrong, did I?). The remaining subnet has 256 addresses. Usually the all-0 network address and all-1 broadcast address are not used, meaning 10.168.1.0 and 10.168.1.255 will not be assigned to devices.
Finally, I hope you can ping through. On Android, you can install a terminal emulator to test. Once the VPN is successfully set up, you can connect to your home router from the external network. On TP-LINK, you can find the ASIAIR’s IP in the DHCP service, then enter that IP into ASIAIR’s IP connection.
Voila!
If nothing unexpected happens, it will connect! If you have questions, you can DM me on Douyin. My Douyin ID: chen137.03