
The following method works for both g03 and g09.
1. Extract the Archive
First, extract the files. My filename is G09.B01.LINUX_E64-930X.tgz, and the file is on the desktop. In actual use, enter the corresponding file path and filename for your system; you can use the Tab key for completion.
tar -xvf Desktop/G09.B01.LINUX_E64-930X.tgzNotes:
- Make sure the files are fully extracted. The first time I installed it, for some reason all files with the
exesuffix were not extracted, so the installation kept failing; extracting the archive again fixed it. - Try not to use
sudo. If there is a permissions issue in your Home directory, usesudoto extract the files and then restore the permissions, or create a user group to manage permissions.
Change the folder permissions:
chmod -R u=755 g09Create a group and user, then change the group and user ownership of the files and folders:
sudo groupadd g09users
sudo useradd g09 -g gaussuser
chgrp -R g09users g09
chown -R g09users:gaussuser g09
Add the user to the group:
usermod -G g09users gaussuser2. Installation
In fact, the installation process is mainly about setting environment variables.
Go to your home directory, press Ctrl+H to show hidden files, open the .bashrc file, and add the following content to the end of the file. When installing g03, simply replace every g09 below with g03. Pay attention to your g09 directory and username, and modify them according to the following format.
Note: After installing several times, I found that after modifying /home/yourusername/.bashrc in the normal user's home directory, each time I used su to obtain superuser privileges, I still had to run source /home/yourusername/.bashrc before the environment variables were set successfully. I found that modifying /root/.bashrc directly avoids having to reset the environment variables each time.
#gaussian09
export g09root=/home/yourusername
GAUSS_EXEDIR=$g09root/g09/
export GAUSS_SCRDIR=/home/yourusername/g09/scratch
LD_LIBRARY_PATH=$g09root/g09/:$LD_LIBRARY_PATH
PATH=$g09root/g09/:$PATH
export g09root GAUSS_EXEDIR GAUSS_SCRDIR LD_LIBRARY_PATH PATH
source $g09root/g09/bsd/g09.profile
Finally, create a scratch directory inside the g09 directory.
3. Running
The final Error occurred because I pressed Ctrl+C to terminate the program.
If running the command with sudo gives permission denied, use su to obtain superuser privileges instead.
First set a password for the superuser. Enter the following command in the terminal, then enter the password:
sudo passwd rootThen enter the following command, followed by the password you just set:
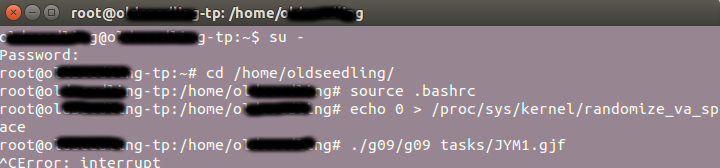
su -This takes you into root's home directory, /root. You need to switch to the user directory /home/yourusername, which is where we placed the g09 directory.
cd /home/usernameEnter the following commands. The first one is used to avoid Segmentation fault; it can only be executed under su, and under sudo it will report insufficient permissions (Permission denied). This command can also be added to /etc/rc.local so it runs automatically at startup. The second command runs Gaussian. ./g09/g09 is the path to the g09 file inside my g09 directory, and tasks is the directory where I store my task files, gif. You can add & at the end of the command to run it in the background.
echo 0 > /proc/sys/kernel/randomize_va_space
./g09/g09 tasks/xxx.gif &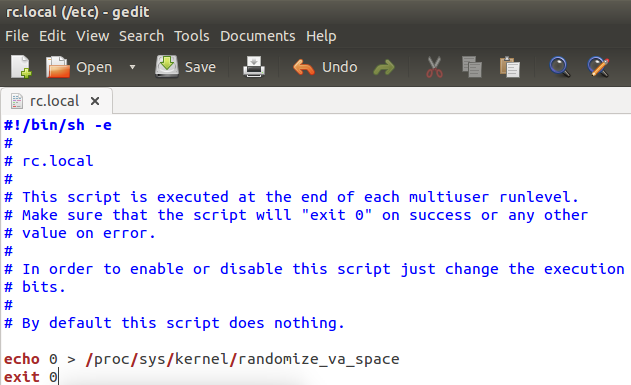
4. Installing GaussView
Add the following content to the end of .bashrc:
export GV_DIR=/home/yourusername/gv/
export LIBPATH=/home/yourusername/gv/lib
export LD_LIBRARY_PATH=$LD_LIBRARY_PATH:/home/yourusername/gv/lib
PATH=$PATH:/home/yourusername/gv/
5. Common Errors
1. forrtl: No such file or directory
The scratch directory has not been created, or the directory path is set incorrectly. This is Gaussian's output directory.
2. Warning: omp_set_num_threads (4) greater than available cpus (2)
This is caused by an incorrect setting in the gif file: the CPU has 2 cores, but it was set to 4. Open the task file and change the CPU count back to the actual number available on the computer.
3. Segmentation fault
The error message may look like this:
Erroneous write during file extend. write -1 instead of 4096
Probably out of disk space.
Write error in NtrExt1: Bad address
Segmentation fault
Solution:
sudo echo 0 > /proc/sys/kernel/randomize_va_spaceIt is best to write this into the /etc/rc.local file (on Ubuntu; on other systems, write it into the corresponding file) so the command is loaded automatically at startup, saving time and effort.
4. ntrex1: Bad file descriptor
The error message may look like this:
Error: segmentation violation
rax 0000000000000000, rbx 00007ffffffdecb0, rcx ffffffffffffffff
rdx 00000000000029b8, rsp 00007ffffffdebc8, rbp 00007ffffffdecc0
rsi 000000000000000b, rdi 00000000000029b8, r8 00002aaaaaaf2300
r9 0000000000000000, r10 00007ffffffde990, r11 0000000000000202
r12 00000000ffffffff, r13 000000000061c830, r14 0000000000000001
r15 0000000000010000
-- traceback not available
Aborted (core dumped)
This is caused by an incorrect %chk setting in the gif file. Linux does not have Windows-style drive letters and directory structures, for example:
%chk=D:he-test-c.chkJust remove the drive letter, for example:
%chk=he-test-c.chk5. After running g09, Gaussian reports that the Gaussian directory permissions are too broad
After running g09, an error occurs. Checking the log file shows the following message:
Entering Gaussian System, Link 0=g09
Input=1.com
Output=1.log
Files in the Gaussian directory are world accessible.
This must be fixed.
The reason is that the permissions on the g09 folder are too broad. If the entire directory is changed to 777, this problem may occur. The solution is to use permissions such as 755 or 750 for everything except the scratch directory. This is why the earlier recommendation was to manage permissions by changing the user group.